Snowman made from scrap materials. How to make a snowman with your own hands: master class
What New Year would be complete without souvenirs and toys? It’s nice to buy them, give them as a gift, decorate your home with them, and even more nice to make them yourself. We already know many ways to create a Christmas tree with our own hands, we know how to make Christmas tree decorations and sew New Year's boots, and today we will also learn how to make snowmen with our own hands!
Before you make a snowman with your own hands, we’ll stock up on materials (the size of finished snowmen is 25 cm):
- White terry cloth
- Light green or green terry cloth
- Fleece of any colors
- Holofiber or other filler
- Black beads
- Glue
- Threads
- With a needle
- With pins
Sew a snowman
Snowman body
A DIY fabric snowman is made from three balls of different diameters.

In turn, each ball is made from six wedges. To do this, take a white terry cloth and fold it in half. Next, we outline the wedges so that we get three parts of each size. A small distance must be left between the parts.
The size of the wedges is determined diagonally and equals:
- 10.5 cm
- 8.5 cm
- 7.5 cm


We fold three pieces of each size, fasten them with pins and sew them on a machine.

We turn them inside out and stuff them with holofiber. We get beautiful round balls for making snowmen with our own hands.


Sew a nose
Let's move on to making the nose. It is made from orange fabric. To do this, you need to fold it in half and outline a triangle, then sew it on a machine or by hand, turn it inside out and stuff it with filling.

The nose is attached to the snowman's head with a hidden seam.


Sew on the eyes


Making arms and legs
The snowman's legs and arms are made from white terry cloth using a paper template.

We stitch it, turn it inside out, stuff it with stuffing, sew up the hole with a blind stitch.


Snowman's hands

Snowman legs
In order to attach the arms to the snowman's body, we use the thread method.


The snowman himself is ready!

Clothes for a snowman
Sew a hat
Let's dress up our snowman in a hat made from fleece. To do this, cut out a rectangle measuring 21*15 centimeters, fold it in half and stitch it.

On one side of the workpiece, cut off the edge with scissors in a zig-zag shape:

And on the other hand, using the same scissors, we cut strips in the form of a fringe.

We put the hat on the snowman, tucking it at the base of the head. We collect the fringe on the top of the head into a bun and tie it with a small piece of fleece.

We glue the edges of the cap.

Making a scarf

We tie it on the snowman and start making mittens.

Snowman mittens
To do this, take a strip of fleece again, fold it in half, stitch it and turn it inside out. We make the cut along the edge with a zig-zag.

Christmas tree made of fabric
The final stage is to make a Christmas tree from light green terry cloth. To do this, we outline a triangle measuring 17*16 centimeters.

Fold it in half and stitch it, not forgetting to leave a hole for the filling.

Time goes by very quickly and, despite the fact that there is no smell of snow now, the winter months will not take long to arrive! New Year 2020 is coming soon, the symbol of which is the White Rat. Pragmatic people prepare for everything in advance, maybe we should learn this too, so that the holiday does not take us by surprise. By the New Year, stores begin selling a variety of toys. But to decorate your home for the holiday, you can not only buy ready-made accessories, but also make them yourself. A DIY snowman is an original toy that makes the atmosphere festive.
Snowman made of corrugated paper
A wonderful snowman can be made from ordinary corrugated paper. Even a child can handle this job.
- Corrugated paper (black, red and white);
- Plasticine (it is better to take plasticine of a light shade);
- Toothpicks.
Manufacturing process:
- We take plasticine and roll “snow balls” out of it for our snowman according to the principle from large to small.
- Now you need to make squares from white corrugated paper. Cut out squares measuring 20 by 20 mm from paper.
- Then, one by one, put a toothpick into each paper square and roll it into a tube. Thus, we make a tube on a stick. This must be done with all squares.
- Starting from the bottom, string the resulting tubes on a stick onto a plasticine snowman. Please note that we stick in a circle not very tightly to each other. This way we cover the snowman completely. The end result is a cute paper snowman.
- Then we make his hands from black corrugated paper.
- Using red paper we make a bucket for the head and spout.
- Our snowman is ready!
Snowman made from a sock

Making such a snowman does not take much time. Anyone who wants to can cope with this task.
To make it you will need:
- White sock;
- Strong white threads;
- Needle;
- Scissors;
- Pins with bright heads;
- Buttons;
- Glue;
- A piece of scarf material;
- Wide tape.
Manufacturing process:
- The sock is cut into 2 parts so that its lower part does not have a heel - this is a snowman's cap, and the base is created at the top.
- The top of the sock is turned inside out. The heel part must be bandaged, then turned inside out so that there is a pouch.
- The sock is pulled over a roll of tape and filled with rice.
- The snowman should be shaped and tied with thread
- The neck of the toy is tied with thread. This is how the head is separated from the rest.
- Then you need to tie a scarf around your neck and put on a hat from the rest of the sock.
- Then the buttons are glued, and the pins will serve as the eyes and nose.
This completes the making of the snowman! Such a simple and at the same time beautiful toy will create a suitable New Year's atmosphere.

A simple and interesting option made from available material that everyone can find: burnt out lamps. Be careful! Don't break it!
To make it you will need:
- The actual lamp;
- Paper napkins or toilet paper;
- Paper glue;
- Paste;
- Acrylic paints;
- Paint brush.
Manufacturing process:
- Using paste, you need to cover the light bulb with toilet paper or napkins according to the papier-mâché principle.
- We wait until it dries completely.
- Now we cover the entire surface of the lamp with white acrylic paint, imitating snow. It's better to do this in several layers.
- After the paint has dried, you need to draw eyes, nose and mouth, decorate the snowman with rhinestones and stickers of your choice.
- Using a string, we make a loop and hang our finished snowman.
Snowman made from plain colored paper

A beautiful snowman made from plain paper that can be easily made in a very short time. By the way, if you make a lot of these crafts and fasten them with ribbon, you will get an original garland.
For production you will need:
- White A4 paper, it is better to choose thicker paper - 2 sheets;
- Multi-colored paper, which will be needed to make an outfit, a nose and a scarf;
- Black marker;
- Scissors;
- Glue;
- Sequins, rhinestones, buttons;
- Paper cake pan;
- Coin.
Manufacturing process:
- We cut one sheet of white paper into strips lengthwise, the second - across.
- We collect the resulting strips into a ball, fixing them with glue.
- Now you can draw or glue on the snowman’s eyes, nose, and buttons.
- Cut out a long strip of colored paper - this will be a scarf. Let's glue it.
- We use a paper cupcake tin as a hat.
- To stabilize the snowman, glue a coin to its bottom.
- The springy funny snowman is ready!
Snowman made from paper towel or toilet paper rolls

This simple snowman can be made from regular toilet paper rolls or paper towels! Try making this craft with your children.
To make it you will need:
- A paper towel or toilet paper roll;
- White paper;
- Colored markers;
- Colored paper;
- Old colored socks;
- Felt for decoration (optional)
Manufacturing process:
- Take the sleeve and carefully cover it with white paper.
- Using colored markers we draw the snowman's eyes and buttons on his stomach.
- Cut out and glue a nose and scarf from colored paper.
- We cut out a hat from an old sock and put it on the snowman. You can also make a scarf.
- The miracle snowman is ready!
Snowman made of plasticine

You can make an original toy for the Christmas tree with your own hands. A beautiful snowman is made from ordinary plasticine. Making such an accessory will not take much time, but will bring a lot of pleasure.
To make it you will need:
- Cardboard sheet;
- Simple pencil;
- Scissors;
- Rope;
- Scotch;
- Plasticine - white, orange, brown, black, blue, purple, green;
- Skewer;
- Stack.
Manufacturing process:
- A circle is drawn on a cardboard sheet, then it must be cut out.
- One side is covered with white plasticine.
- Oval legs are created from purple plasticine, which are then attached to the bottom of the circle.
- The oval nose is made from orange plasticine.
- The black material is useful for the eyes and smile.
- Highlights should be made from white plasticine on the nose and eyes.
- They also make 2 buttons from blue plasticine. Use a skewer to make 2 holes in them.
- Sausages are made from purple and blue material, then a cap is formed.
- A ball is made from white plasticine and attached as a pompom. Then a “fluffy” texture is created with a skewer.
- The brown material is used to create the handles of the sticks.
- A knitted pattern is drawn on the hat using a skewer.
- Lines are made on the legs.
- The hat is decorated with 3 green leaves and 3 orange plasticine berries.
- The rope is fixed to the other side with tape.
The Christmas tree toy is ready! This craft can be done with children. And it is suitable not only for decorating a Christmas tree, but also as a gift.
Snowman made of cardboard and cotton wool

With very young children you can make a snowman out of cotton wool and cardboard. Parents will need to help the kids quite a bit.
To make it you will need:
- Cardboard;
- Cotton wool (can be in balls);
- White paper;
- PVA glue;
- Multi-colored markers;
- Small twigs (wash and dry in advance);
- Disposable plate.
Manufacturing process:
- On cardboard we draw a silhouette of a snowman from three balls.
- Cut out the resulting shape.
- Pour PVA glue into a saucer.
- We lay out the cotton wool into pieces or scatter ready-made cotton balls. Dip cotton wool in glue and glue it onto a cardboard figure of a snowman. Thus, you need to cover the entire surface on one side.
- We glue our prepared branches-handles onto the reverse side.
- All that remains is to draw or cut out eyes, a carrot nose, a mouth, and buttons from colored paper.
- The snowman is ready! You can glue a loop to it so that the craft can be hung on the Christmas tree; you can use a disposable plate to make a base for stability.
Snowman made from yogurt cups

If you want a cool idea for creating a creative snowman, then here you go. Surely you have a small number of plastic bottles of drinking yogurt or kefir lying around your house?! Call your kids to admire your masterpiece and help you create such beautiful crafts!
To make it you will need:
- a bottle of drinking fermented milk product;
- a plastic cup of yogurt;
- colored paper in red, orange and black;
- scissors;
- glue;
- small foam ball;
- White paper;
- stationery knife;
- black nail polish.
Manufacturing process:
- To create an unusual little snowman, you will need to take one medium-sized plastic bottle and a foam ball corresponding to the size of this container.
- Using a stationery knife, carefully cut a hole in our ball so that you can place it on the neck of the bottle. This will be the head of our product.
- After the body has been drawn, we will need to place a headdress on the glue - it will be a cup of yogurt.
- From colored paper we cut out the hands of our fairy-tale character, a broom, a scarf, a nose in a triangle and a mouth - a smile. We attach all elements with PVA glue.
- We make the eyes and buttons on the body from ordinary nail polish. That's the whole trick of our craft! Create a lot of these tricks together with your child, place them throughout the house: on window sills, on dressers, on the kitchen and holiday tables! Surround them with tangerines and sweets, rain and tinsel to feel the mood of celebration!
Cool snowman made of metal caps

With a snowman made from plastic bottles, we seem to have told you everything, and now your husband’s task is to collect a small amount of metal caps from beer or lemonade. Yes - yes, exactly, lids, since we will have to make a cool snowman out of them like in the photo. If you want to learn more about this, then let’s start immediately with our step-by-step master class.
To make it you will need:
- metal beer caps;
- hot glue;
- glitter nail polish;
- orange and black nail polish;
- red yarn for a scarf;
- satin ribbon for attaching to the Christmas tree.
Manufacturing process:
- We take three metal lids and fasten them together with hot glue.
- Then we transform the inside white part of the lid with glitter nail polish so that it sparkles under the mechanical lights.
- We design the Snowman's face. For this purpose we need to use black and orange nail polish. We draw eyes, a mouth and a nose - a carrot. It would also not hurt to depict buttons on the body of our craft, created with our own hands from scrap materials.
- Now our fairy-tale character has come to life, smiling cheerfully and cheerfully at us, but to complete the picture, a red scarf made of soft yarn for knitting is not enough. We cut off a small part of the threads and tie it around the neck of the snow hero to your taste.
- All that remains is to attach a satin ribbon at the base of the head so that you can easily hang our snowman on the tree for the New Year 2020.
Master class on a snowman made from cotton wool

Thanks to this master class, you will be able to make a snowman with your own hands in just 30 minutes, which will perfectly decorate the Christmas tree for the New Year. It is quite easy to do, you can even do it with children.
To make it you will need:
- glitter;
- soap;
- cotton wool;
- water;
- glue;
- bright orange paint;
- beads;
- small twigs.
Manufacturing process:
- So, the cotton wool, if it is rolled into a tight ball, needs to be fluffed up.
- We wet our hands in water and soap them, after which we roll two balls out of cotton wool, one larger, the other smaller.
- Rolling the balls will be very easy. We dilute the glue slightly with water, after which we lubricate the cotton balls with the resulting mixture.
- We connect the balls using a toothpick and place cotton balls on it.
- We cover our Snowman with a layer of glitter, which will create the illusion of a snowball.
- How to make a carrot nose? Wrap a little cotton wool around the tip of a toothpick, then paint it with bright orange paint.
- Break off a toothpick with cotton wool and insert it into the ball - the head.
- We make the eyes and mouth of the fairy-tale character from black beads, and the arms from twigs.
- Let the craft dry for about three to four hours.
Making a snowman from threads

You already know how to make crafts from cotton wool, and now let’s try to make a snowman from threads and glue for the New Year 2020. Look at the photo and instructions below and try it.
To make it you will need:
- white threads,
- glue,
- three balloons.
Manufacturing process:
- We inflate balloons of three different sizes - a “head” and two balloons for the body.
- We take the first ball, coat it with glue and, holding it by the tip, wrap it with threads over the entire area.
- Having wound the first layer, we smear the threads with glue, after which we make another layer.
- Set the ball aside, giving it time to dry. In the same way we make two more balls, larger in size.
- How to remove a ball from a ball of thread? Very simple! Once the glue dries, you just need to pierce the ball and pull it through the threads.
- Now the balls need to be connected to each other, slightly pressing at the points of fastening.
- Let's decorate the head of our product - the eyes can be made from beads, the mouth from black thread or also from beads, and the nose - a carrot can be made from cotton wool and a toothpick. In this simple way, it is quite possible to make a snowman with your own hands from scrap materials for the New Year, quickly and beautifully!
Master class with visual video instructions
Paper snowman

The winter holidays are coming very soon, and it’s time to pick up master classes on which you can make a snowman with your own hands for the New Year 2018 for kindergarten or school - from paper, from thread, from cotton pads, from socks and from other improvised materials.
Winter and New Year are all things that children look forward to. For kids, a festive tree, gifts, fluffy snow, winter fun, snowmen and snowballs are the most desirable winter entertainment. And we offer to learn how to make a snowman with your own hands for the New Year. You can make a wonderful snow beauty from the materials you have at home, together with your child, and decorate a room, a Christmas tree, or for handicraft competitions in kindergarten or school.
In order to create an adorable snowman with your own hands for the New Year from socks, there are several ways. All of them are based on the fact that part of any sock is fastened on one side and filler is stuffed into the sock. And then you need to pull the socks in the middle, tie them at the top and decorate them.
The article will provide several variations with tips and descriptions to make the creative process more exciting and fruitful. We will try to make funny snowmen from various materials, from everything that can be found at home:
- socks;
- plastic cups;
- paper;
- disks;
- thread
Let's start! The first master class is dedicated to a snowman made from simple socks.
Snowman made from socks
In order to make such a beauty yourself you need:
- Socks. You need to take white ones for the snowman’s body and you can take colored ones for the cap and clothes.
- Threads with a needle.
- Glue gun.
- Paints and brush.
- Beads.
- Felt.
- Sintepon.
- Scissors.
Now look at several collections of photos with step-by-step instructions for making a snowman with your own hands for the New Year:


Step-by-step photos of making a snowman from socks
Pretty simple instructions, not a complicated process, amazing results. This is all a formula for success for creativity with children. You can decorate a snowman made from socks to your taste, completely different from the one in the photo. Here you can use your imagination and use any material you find at home.
Video tutorial on making snowmen:
We use threads
Next, we will describe two options for how to make a snowman with your own hands for the New Year from threads. One of them is quite simple. This is a snowman made from pompoms, which can be made for a competition for school or kindergarten. For it we need:
- white threads. Here it is better to take acrylic or wool mixture;
- half beads for eyes and decorations;
- ribbon or decorative braid;
- fluffy wire. It is sold at any craft store;
- twigs for pens;
- glue. You can use a hot glue gun or Moment Crystal instant glue.
Now let's start creating a fluffy snowman:
- Initially you need to make 2 pompoms from threads. To do this, take 2 cardboards. One is wider, the other is a little narrower, since we need to make one large pom-pom, the other smaller. You need to wrap as much thread as possible on these cardboards. The pomp of the pompom depends on the number of threads. Then we pull the thread inside the wound threads, tie it at one end and cut it at the other. We get two pompoms for the bottom and top of the snowman.
- Now you need to tie both pompoms together using the tails of the threads.
- Our snowman is ready. All that remains is to glue on his eyes and nose, buttons and branches on the sides of the handle.
- We tie a ribbon scarf to the snowman. Before this, the edges of the tape must be cut in a special way. To do this, fold the tape lengthwise and cut it diagonally from the middle to the tip, unfold the tape, and lightly scorch the edges with a lighter.
- Now we make headphones from fluffy wire. Let's bend it as shown in the picture and put it on the snowman's head.

Step-by-step photos of making New Year's snowmen
- white threads. This snowman requires knitting cotton;
- PVA glue;
- air balloons;
- twigs for pens;
- buttons for eyes and for decoration;
- paper or felt for the hat;
- a piece of fabric for a scarf;
- hot glue.

When everything is ready, we begin to make an openwork thread snowman:
- Inflate two balloons. We make one large, the second smaller.
- Pour PVA glue into a bowl and soak the threads there.
- After that, we immediately begin to wind the threads in glue onto the ball in a random order, chaotically.
- When both balls are wrapped with thread, leave them to dry. It's better to leave the balls overnight.
- When the threads are dry, you need to burst the balls and carefully pull them out.
- Now we glue both balls, the small one on top of the large one.
- At the bottom of the large ball, cut off the rounded part with scissors so that the snowman stands steadily.
- Glue handles from twigs to the snowman.
- We cut out the hat, glue its parts and put it on the top of the snowman’s head, securing it with glue.
- Now we need to glue buttons in the form of eyes onto the snowman’s body for decoration.
- We make a carrot out of paper or felt and glue it in place of the spout.
- We make a scarf from a piece of fabric and tie it to the snowman.

PHOTO: Snowman made of threads for New Year 2018
It should be noted that the process is quite labor-intensive, since you need to carefully make the balls themselves from threads in glue, but when this stage is completed and the balls have dried, all that remains is a pleasant job that you can do together with the kids.
Such a snowman, made with your own hands for the New Year 2018, will be very good for an exhibition or decoration for a kindergarten or school group.

Original ideas made from paper
Paper crafting is a very simple and surprisingly enjoyable activity. Kids really love this type of creativity. For the New Year, you can make a snowman out of paper with your own hands. Below are several options for ideas with a step-by-step description of their implementation. Let's see how you can make amazing snowmen from plain paper or paper napkins.

Snowman made from palms for a school competition
- white, blue, orange paper;
- pencil;
- scissors;
- glue.
Let's get started:
- On white paper you need to circle your palms and cut them out. You need to make as many of these palms as possible.
- From blue paper we cut out a cap - a triangle and three snowflakes for buttons.
- Now we glue the palms. You need to make 3 circles out of them: 1 large, 1 smaller and small.
- Glue all three circles together.
- Now we glue the cap on top and snowflakes in place of the buttons.
- The nose, eyes and smile can be cut out of colored paper and pasted, or you can draw with paints or felt-tip pens.


The snowman made from palms is ready. It can be attached to the wall of a child’s room or in a kindergarten group.

Snowman made from paper napkins
Let's prepare everything we need:
- white paper napkins;
- pencil;
- scissors;
- glue gun;
- three foam balls of different sizes;
- skewers or toothpicks for connecting the balls together;
- buttons for eyes;
- felt or paper orange cone for the spout;
- twigs for pens.
Let's start tinkering:
- Napkins need to be cut into squares.
- Cut off the bottom of the largest ball so that the bottom is flat for stability.
- Now we cover each ball with napkins. We will glue using the trimming technique. To do this, twist a square of napkin onto the other end of a pencil or any wooden stick. Dip it into PVA glue and apply it to the ball. So we cover all the balls. Glue all the elements close to each other, so the balls will turn out fluffier.
- Then glue the balls one on top of the other.
- We attach the branches - arms and eyes with a nose.

The paper napkin snowman is ready. You can decorate it to your liking, put a scarf or hat on it.
Look at some more photos with ideas on how you can make a snowman with your own hands for the New Year:
Applications with snowmen
Surprisingly, applique can be made not from paper. Below is a step-by-step master class on how to make a snowman with your own hands for the New Year from cotton pads, which you can send to a competition at school or kindergarten. This will be a beautiful New Year's applique. The child himself will be happy to do it, but under the supervision of his parents.

To tell your child what to do, let’s take a closer look at how to do this. Let's get ready first:
- cotton pads. We will make a snowman and snowdrifts from them;
- thick cardboard for the base. It can be any color. Blue, cyan or purple will be very good;
- glue. You can use PVA or any other for paper;
- colored paper;
- scissors.
Now let's begin:
- On the cardboard base we glue a snowman made of three or two cotton pads. Just glue the disks one on top of the other. You can make one or two such snowmen on one cardboard.
- Now you need to paint the snowman. Cut out a cap, eyes and nose from colored paper. Cut out the scarf and handles with mittens. We glue all the details onto the snowman.
- We will also paste snowdrifts from halves of cotton pads onto the panel of snowmen. You can cut out rectangles of houses and glue them to the sides, drawing the windows with a felt-tip pen.
The child can dream up his own imagination and come up with something to add to the applique. It could be the sun, clouds, and so on.

In addition, cotton pads can be used to make an excellent toy. You can hang it on the Christmas tree or decorate it with a Christmas wreath, walls and so on. Let's get ready for work:
- cotton pads;
- threads with a needle;
- a little padding polyester;
- felt;
- a pair of beads for eyes;
- glue. It is better to use a second Crystal Moment.
Now let's get started:
- Let's take 2 disks for the lower part and 2 for the upper. We will cut the ones for the top a little in a circle, making them smaller in diameter.
- Now you need to sew the parts together with a seam over the edge. But let's leave a little unstitched edge for filling and sewing them together.
- Let's fill both parts with padding polyester.
- Let's put them together one on one where there is an unsewn gap and sew them up.
- Now let's decorate. We cut out a cap from felt and sew it to the snowman on the top of the head using the same seam.
- Next we will glue the beads - eyes. Cut out a triangle of orange felt and glue it in place of the spout.
- We will cut out a strip of felt - a scarf and tie it to the snowman.
- You can make decorations by cutting out leaves and berries from colored felt and sticking them on the snowman.
This beauty can be hung on a Christmas tree by attaching a string to it or used to decorate a wreath or for other purposes.

Plastic cups - turn them into a snowman
Now let’s make a snowman with our own hands for the New Year 2018 from cups, ordinary plastic disposable cups.

This DIY snowman will turn out to be quite large. They can decorate an apartment, a group in a kindergarten, a classroom at school. You can place a garland inside and then the snowman will glow. But let's talk about everything in detail and in order.
Let's prepare everything for work:
- Plastic cups. For one snowman we need as many cups as large as you need the snowman. For a big snowman you need quite a lot. The first row alone will take 25 cups.
- Stapler and staples for connecting cups.
- You can take a real hat and scarf and then dress up the figurine.
- For the eyes, you can take balls equal in size to the neck of the glass. We'll paint them black and put them in the cup itself in the right places.
- Glue the nose into a carrot-shaped cone from orange felt.
- We will also need a glue gun.
Let's get started:
- Lay out the first row like this. Place the cups in a circle with the bottom inward and the neck outward. We fasten the glasses together with a stapler. We make several rows in this way, each subsequent one is smaller than the previous one, since we place the glasses between those in the previous row.
- Now let's make the head. The first row for the ball under the head consists of 18 cups. We do everything exactly the same.
- Then we attach the head to the body with a stapler.
- Now we insert the balls - eyes. We will first paint them black and attach them with glue.
- Then we attach the spout.
- We tie a scarf and put a cap on top. For reliability, secure with glue.
- You can place a garland inside or leave the snowman like that.

The snowman can be decorated to your liking. You can attach twigs to him as handles and “give” a broom in his hands. You can attach a wide felt strap to the snowman, or a real one if you can find the right size. Attach it with a stapler.
You can make buttons from exactly the same balls by attaching them to the neck of the glass in suitable places. Or cut out snowflakes from colored paper and glue them to the snowman anywhere, as if real snow fluffs lay on top of our handsome man.
You can make such a snowman for a competition for school or kindergarten!
Another wonderful snowman that you can make with your own hands for the New Year is presented in the video below:
Children are already starting to make crafts in kindergartens and schools. Many even hold competitions for the best New Year's craft. School exhibitions are decorated with Santa Clauses, Snow Maidens, Christmas trees and snowmen made by hand. A variety of materials are used for crafts with children - felt, fabric, paper, cotton wool, and even salt dough.
We have selected the best ideas from which you can make the most winter children's craft with your own hands - a snowman. Below you will find photos of finished toys and many ideas on how to make a snowman.
Make a snowman a pair of white socks is no problem. Just put cotton wool or padding polyester inside the sock (you can buy a special filling, and even cereals - rice, buckwheat, peas), tie a scarf, decorate with a hat and sew on a couple of buttons - the snowman is ready.

It’s a little more difficult to make an openwork snowman from white threads. Balls of thread are used for the base. You need to inflate the balloons, moisten the selected threads (can be of different colors) in PVA glue and wrap them around the balloon. When the glue dries, the balloon needs to burst - you will be left with an openwork ball of thread. By connecting several balls, we get a snowman. This thread snowman can be decorated with buttons, beads, rhinestones, and colored ribbons.


Felt snowmen also quite popular among crafts. Felt is great for children's crafts, it is soft and holds its shape. You can sew a felt snowman as a soft toy:

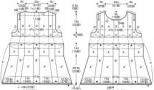
A snowman made from disposable cups has gained enormous popularity. The cups are simply attached to each other with a stapler, then 2 balls are formed from them and attached to each other. This snowman can be placed near the Christmas tree in a kindergarten or school.
Snowman made from glasses:

For the street, you can make a snowman from car tires:

or from the bottom of white plastic bottles:

You can also make a snowman from a yogurt bottle (or deodorant) by covering it with cotton wool or padding polyester:

A popular material for making a snowman is paper. You can even use toilet or white napkins.

Can you make it voluminous? paper snowman, gluing the parts as shown in the pictures below.