Master class: Carrot nose for a snowman. DIY felt snowman DIY felt Christmas toys snowman
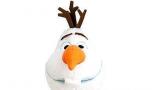
How to sew a soft toy Olaf the snowman from the movie “Frozen” with your own hands. Olaf the snowman pattern.
I think that the cartoon character from the film “Frozen” the snowman Olaf was liked by the audience and many want to sew a similar funny toy. Snowman Olaf is very cute and attractive.

The pattern for Olaf the snowman is quite complex. It is better to sew a soft toy from felt; in addition to white, you will need a little brown, black and orange or pink. To fill it with synthetic fluff, you will also need wire, thread, and a needle.


How to sew Olaf the snowman from the movie “Frozen” with your own hands
According to our dimensions, we first make pattern pieces from paper. Then we transfer the pattern details onto felt, trace them with colored chalk, cut them out with small seam allowances and sew them together as shown in the photo.
First the torso:

Then we stuff the parts with synthetic down and sew together the parts of the body.
We sew the head, as shown in the photo below, first sew the darts on the parts, sew the halves of the parts, then turn them inside out and stuff them with synthetic fluff. We cut out three parts from brown felt - hair, and carefully sew them to the top of the head.

From red felt we cut out a piece for the nose in the form of a cone, sew the open sides together and stuff it with synthetic down. We shape the face, mark the location of the eyes, nose, and mouth. We sew the finished parts into place.

All that remains is to sew on the hands (see photo). Use the wire to move the snowman's arms and also to push the synthetic fluff through. We sew the arms to the body.

We cut out buttons from felt, sew them in place and the soft toy Olaf the snowman is ready!

And with the help of this pattern, you can easily make a flat Olaf the snowman toy, which can be used as a refrigerator magnet, as a Christmas tree decoration, or as a keychain.


He is neither small nor great,
Snowy white snowman.
His nose is like a carrot
He loves frost very much
In cold weather, it does not freeze.
And spring comes and melts.
What to do, how to be?
How can we preserve it?
Maybe a white refrigerator,
Should I buy it for a snowman?
To prevent the snowman from melting with the arrival of spring, it is not necessary to buy an additional refrigerator; you can simply sew a snowman out of felt.
To make snowmen you will need:
Felt of different colors;
- Multi-colored sewing threads or floss threads;
- Scissors with sharp thin blades (for example, manicure scissors);
- Marker or pencil for drawing outlines of patterns on fabric;
- Various ribbons for decoration and hanging;
- Acrylic paint for fabric;
- Synthetic padding or padding polyester for stuffing;
- Transparent glue for gluing some parts (for example, Moment Crystal glue).
All snowmen are sewn from two primitive pattern parts, 4 parts are cut out for the mittens, and 1 part for the nose.

It’s quite simple to sew such a snowman: select the shade of felt you need (as you can see in the photo, snowmen look very cute both in the classic white color and in beige and light brown vintage tones), cut out all the necessary parts for the body and mittens. At the very beginning, we carefully sew the mittens together with an overlock stitch and sew beaded eyes and a carrot nose onto the front side of the body (a little tip for lazy people: the eyes can be cut out of felt and, together with the carrot nose, glued to the body, for example, using Moment Crystal glue). We sew buttons along the tummy: small real beads or molded from polymer clay (and again, if you don’t want to bother with sewing on buttons, you can glue buttons cut from felt). After finishing decorating the snowman, you need to sew the parts of the body together; to do this, we sew the body along the edge with an overcast stitch. If desired, to give additional volume to the snowman, you can stuff it with padding polyester or padding polyester.
Below is a small selection, so to speak for inspiration, on the design of snowmen from different authors (all author's logos are preserved).


Since our snowmen spent a long time in the cold, we paint a frosty blush on their cheeks with acrylic paint for fabric: using the “dry brush” method we get a gentle blush, with blurred boundaries; or add blush by dipping a cotton swab into the paint, in this case the blush will be rich with a clear border.
A mandatory attribute of a felt snowman is a scarf. Don't forget to tie a satin ribbon or a small piece of non-flowing fabric around your neck. To make it more fun, take a scarf ribbon with some bright print.
Making these cheerful and positive snowmen is not difficult at all. They can be used as pendants on a holiday tree or placed on a shelf along with other New Year's decorations. To make a pair of snowmen you will need:
- Soft white felt for the base, thin blue and pink felt sheets for hats and scarves. A small piece of orange is for the nose.
- Sewing threads of all the listed shades and black (or any dark shade) - for embroidering the mouth.
- Small black beads for eyes.
- Beads or rhinestones for decorating hats.
- Synthetic fluff, holofiber for stuffing toys.
- The braid is white.
- Scissors, tailor's soap.
- Pendants for decoration.

2. Cut out the main parts (torso, arms) from white felt, and hats from pink and blue felt. For scarves, cut strips: 1 cm * 12 cm - blue scarf, 2 cm * 8 cm - pink.

3. First you need to decorate the faces of the snowmen. Take black beads and sew them onto the top of the heads at a distance of 1.5 - 2 cm from each other.

4. Then embroider smiling mouths on the snowmen using dark threads.

5. Make small circle noses from a piece of orange felt. Sew them with a few blind stitches into the middle of the front of the heads.

6. Embroider curls on the body of the girl snowman with pink thread.

7. Decorate the body of the snowman-boy with an embroidered snowflake.

8. Next, place the front pieces of the snowmen over the back pieces and sew them together.

9. At the end, leave an unstitched area and stuff the toys with holofiber through it.

10. After this operation, continue the seam, fasten the thread and cut it.

11. Take the parts of the arms, fold them in two and sew them with the same seam as the base. Sew the finished arms to the body. Set the bodies aside for now.

12. Now you need to make hats for the snowmen. Sew white trim to the blue triangle. Take the second part of the hat and do the same with it.

13. Finish the white part of the hat with a blanket stitch. Then do the same with your other half.

14. Then fold both parts of the product with the wrong sides inward and sew them together. Fold the corner of the hat and sew it to the base.

15. Place the blue hat on the boy snowman and sew it to the head with hidden stitches.

16. Take a blue bead and attach it to the top of the hat.
The New Year's bustle includes a lot of pleasant troubles. We prepare gifts for family and friends, think through the holiday menu and decorate the house. Of the many available materials for creating New Year's toys and decorations, it is worth paying attention to felt.
Which felt to choose
Felt is a soft and dense felt, the edges of which do not need to be processed. It comes in different thicknesses. For the base of the product, it is better to take a material with a thickness of 1 - 1.3 mm, and make individual parts from thicker fabric.
We make Christmas toys from felt with our own hands - step-by-step master classes
Working with felt is easy. It is suitable as a base material for making interesting toys that will become festive interior decor or a decoration for the New Year tree.
How to make a snowman from felt
Involve children in needlework and make a winter guest together.
What you will need for work:
- white felt;
- filler or cotton wool;
- white threads;
- needle;
- scissors;
- markers;
- pens;
- ribbons;
- textile.
Step by step description:
- Cut out a paper snowman template from two circles of different sizes.
Make a paper template
- Place the stencil on the felt and trace along the outline. Cut two blanks.
Trace the template and place it on the felt.
- Sew the details of the snowman using a buttonhole stitch. Leave a small hole through which you need to fill the toy with filler. Then sew up this hole.
Fill the toy to make it voluminous
- You can decorate a snowman in different ways. For example, use felt-tip pens to draw details on it and decorate it with a scarf made of bright fabric. Make a loop from a thread to hang the toy on the Christmas tree.
Draw the snowman's eyes, mouth and nose, tie a scarf
Various materials can be used to make snowman toys, including plastic cups. Step-by-step master classes in our material:
Video: felt snowman on the Christmas tree
Photo gallery: ideas for inspiration when creating snowmen
 New Year's snowman with candy
  Merry New Year's snowman
  One option for a snowman pattern
  Fairytale snowmen in funny caps
  Toy snowmen
  Snowman sketch
  Elegant snowman for your Christmas tree
  Funny snowman Olaf from the cartoon Frozen
  Cartoon characters are one of the popular ideas for creativity.
Making felt Christmas trees
Green, elegant, but not real, but felt, decorated with beads, buttons and other decorative details. Let's try to make an original Christmas tree for our home?
Christmas decorations
A felt New Year's toy can be made in literally 15 minutes.
What you will need for work:
- felt of medium thickness in two green shades;
- scissors;
- pins;
- filler;
- sequins;
- glue;
- matching threads;
- needle;
- satin ribbon.
Step by step description:
- Prepare the template details for the Christmas tree and attach them to the fabric according to the colors. Cut, observing all curves.
Using the template, cut out the details of the Christmas tree
- Place two dark layers of felt together and place a piece of light felt on top. Sew the details. Insert a ribbon between the layers of the top part, which will serve as a loop for the toy.
Make a loop from the ribbon
- During the sewing process, do not fill the toy very tightly with filler. Process all the details of the Christmas tree in this way.
To make a voluminous toy, loosely fill it with any filler.
- Then connect the parts of the Christmas tree, sewing them with a hidden seam at the back. Decorate the toy with sequins, as well as circles cut from leftover felt of different colors.
Decorate the finished toy
Video: how to make a small felt Christmas tree
Unusual Christmas tree for the interior
You can make stylish New Year's interior decor from ordinary felt.
What you will need for work:
- base cone made of cardboard, foam rubber or foam;
- felt;
- buttons;
- beads;
- glue;
- tailor's pins.
Step by step description:
- Wrap the prepared cone in felt and secure with tailor's pins.
Wrap the blank for the Christmas tree with felt
- Use pins to attach the buttons to the fabric.
Attach decorative elements to the tree
- Decorate with additional elements. These can be beads, ribbons, bows.
Decorate the Christmas tree to your liking
Video: original Christmas tree made of felt, beads and buttons
Photo gallery: options for New Year trees
 Christmas tree assembled from felt squares
  The idea of a New Year's garland made from small felt trees
  Felt Christmas tree pattern
  Using felt of several colors when making a Christmas tree
  A variant of the original felt Christmas tree, decorated with beads and sequins
  Felt Christmas trees decorated with beads
  Felt Christmas tree idea
Fairytale Santa Claus with gifts
Do you remember how in Soviet times they put papier-mâché Santa Claus under the Christmas tree? It was and remains an integral attribute when decorating the Christmas tree in many families. Papier-mâché has been replaced by modern materials. And if you like to try new ideas in needlework, we suggest making a felt Santa Claus with a bag of gifts, and even in a sleigh.
What you will need for work:
- felt;
- any fabric for a bag with gifts;
- ribbon;
- scissors;
- filler;
- paints;
- cardboard.
Step by step description:
- Cut out a Santa Claus template from paper.
Cut out a template from paper
- Cut two circles from felt to the size of the head of the future toy. Glue them along the edge and fill them with filler.
Fill the toy
- Do the same with the body of the toy, then connect it to the head.
Connect the body and head of the toy
- Glue the beard, hat and other missing parts.
Make Santa Claus a beard, a cap and a belt
- Cut out a sleigh template from thick cardboard and attach them with glue. Color it to your liking.
Make a sleigh out of cardboard
- Cut a rectangle from the fabric, fold it in half and glue along the perimeter. After that, turn it inside out, fill it with padding polyester or cotton wool and tie it with a ribbon. This will be a bag of gifts.
Make a gift bag and attach a ribbon to it
- Santa Claus with gifts on a sleigh will arrive in time for the holiday.
New Year's toy is ready
Video: how to make Santa Claus on a sleigh with gifts with your own hands
Photo gallery: Santa Claus toy - a selection of ideas
 Making a voluminous toy is not so difficult
  Option for a New Year's toy or keychain
  Step-by-step production of a Santa Claus toy
  For such a toy, a template is enough
  A whole set of toys
  To make such a toy, you need to have some skills
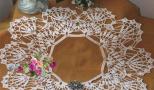
  An original idea for decorating napkins
  Original version of the toy
How to sew funny reindeer from felt
Reindeer, along with Father Frost and the Snow Maiden, have been considered one of the New Year's symbols for many years. They are found in winter ornaments and are depicted on postcards; their figures decorate Christmas trees.
Christmas tree toy - deer face
What you will need for work:
- felt of suitable colors;
- filler;
- dye;
- thread;
- needle;
- beads;
- decorations.
Step by step description:
- Cut out parts from felt using a stencil. Since the toy will be double-sided, you will need two parts of each shape.
Cut out parts from felt
- Sew the nose of the future deer to its head. This piece can be left flat or filler can be added to add volume.
Sew a nose to a deer's head
- Connect the ear parts with a contour seam and fill them with filler.
Connect the ear parts with threads
- Sew a string of beads to the front of the horns, then connect all the parts and add filler.
Fill the toy with padding polyester
- Draw or embroider details on the deer's face.
Embroider a deer's face
Video: making a deer's face
How to make a fawn
A cute little deer with a scarf will bring smiles of affection to those around you.
What you will need for work:
- felt;
- threads;
- needle;
- ribbon;
- glue;
- synthetic winterizer or its substitute;
- a piece of fabric for a scarf;
- bow, beads, heart, pompom.
Step by step description:
- Cut out two parts of the deer.
Cut out parts from felt
- Sew a fabric heart to one piece.
Sew on a heart one detail
- Connect the parts of the fawn by filling the toy with padding polyester. In the process of sewing the parts together, you must remember to insert a loop for hanging from the ribbon.
Connect the parts and fill the toy
- Now use glue to attach the fawn’s tail, nose, eyes and scarf.
Decorate the New Year's deer
Video: making a little deer
Photo gallery: sketches and toys-fawns
 Fawn with applique
  Running deer
  This toy will relieve a gloomy mood
  Christmas reindeer pattern
  A simple template for making a toy
  Another option for positive toys
  Toys can be decorated with applique, buttons, threads
  New Year's deer toys
  Simple applique toy
Soft Christmas tree toys for the New Year
Soft and bright toys for the Christmas tree can be very diverse.
Amazing DIY snowflakes
Do identical snowflakes exist in nature? Let's try to make them from felt with a unique pattern.
What you will need for work:
- medium hard felt;
- pins;
- scissors;
- sequins, beads, pieces of felt;
- glue;
- matching threads;
- needle;
- floss threads.
Step by step description:
- Cut out a template from paper and pin it to the felt.
Attach the snowflake template to a sheet of felt
- Carefully cut out each petal of the snowflake, cutting through small details.
Cut out a snowflake with scissors
- Remove the template from the fabric. To make the snowflake voluminous, you need to fold and grab each petal with stitches.
Straighten the cut out snowflake
- The snowflake is ready to decorate. Any methods are suitable for this: embroidery with threads and beads, appliques from pieces of felt and sequins.
 Applique using felt of other colors and decorative braid
  Volumetric snowflake toy
  It will take patience to cut a snowflake like this.
  To decorate snowflakes, you can use beads, glass beads, beads
  Some ideas for felt snowflakes
  A good alternative to glass marbles, especially important if there are children in the house
  A simple template for making a felt snowflake
Photo gallery: a set of patterns and diagrams for felt toys
 Templates and ready-made owl toys
  Cartoon man in New Year's outfit
  Buttons as decoration - a simple but original solution
  Several ideas for creating felt Christmas trees
  Christmas toys made of felt in traditional colors
  Set of sketches for creativity
  Felt mittens for Christmas tree
  Another option for a toy set
  Toys for a bright Christmas tree
  Set of templates for felt toys
  Cartoon Christmas decorations
  Embroidered felt decorations
  Set of toy patterns
  Set of templates for New Year decorations
  Set of sketches for toys
  Funny felt owls
  The idea of making snowmen and birds from felt
  Decorated snowman and deer
  Colorful birds
  Templates for making toys
  You can use any templates for toys
  Embroidered felt toys
  Idea for a set of felt toys
  To make toys voluminous, fill them with padding polyester or scraps of soft fabric.
  Toys from a fairy tale
  Decorate snowflakes with colorful sequins
  Even from such simple templates you can make interesting toys
  Snowmen and Christmas trees are mandatory holiday details
  The application always looks unusual
  Or maintain one color scheme, if the overall design of the house and Christmas tree requires it.
  Use felt of different colors to make toys
Video: making a pig out of felt
Felt products are associated with home and comfort. Exclusive felt toys can be made in the same style and skillfully used in the New Year's interior. The atmosphere of the New Year holidays will become truly family-like if younger family members are also involved in needlework.
We can make our home warm on the eve of the New Year by creating felt toys. This is a very nice material that will decorate any room.
You can make a New Year's snowman from felt in different ways: sew it by hand or on a machine, glue it together.
A snowman is one of the simplest felt crafts. You can decorate it in any way.
How to make a snowman from felt

Necessary materials:
- felt of different colors
- threads
- scissors
- marker
- decor
- fabric paint
- filler
- glue (crystal moment)
Felt snowman: Pattern

For the body, you can choose white or milky felt. How many parts need to be cut is written on the pattern.
Sew the mittens using an overcast stitch. Sew eyes and nose on the snowman's face, you can also glue them on.
Now you can sew both parts of the body together, first leaving a hole for stuffing, and then sew that up too.
Don't stuff it too much, just a little in the center is enough to give it volume.
A felt snowman on a Christmas tree might look like this:

It is performed in the same way as the previous one, but the decor is made differently. A felt snowman hat is sewn to the top of the head. You can sew on a red stripe as decoration.
Felt crafts are also relevant. The snowman is made of buttons. They are sewn onto round felt blanks.

On one layer you need to sew a ribbon, with which the felt toy will be hung on the Christmas tree

Snowdrifts, buttons and other decorative elements are sewn onto the front side of the toy. In this matter you can show your imagination.
DIY felt snowman: Pattern options
You can make a snowman out of felt using simple patterns. It is enough to cut out all the details from the material and sew them. You can also make snowman appliqués from felt. To do this, simply glue the parts onto cardboard.


Some pictures for inspiration