How to make leaves from foamiran. Crafts from foamiran
Content
Today, needlewomen are provided with another type of creativity - compositions from foamiran (fom). This ornamental raw material is a new invention of the physical and chemical industry and is similar to foam rubber and plastic suede. If you are also interested in such material, then study the instructions below, what is made from foamiran.
How to make flowers from foamiran with your own hands
The main area of application of foamiran is floral design. The material is used to make realistic compositions of field daisies, exquisite roses or other flowers. Various souvenirs and crafts are also made from foamiran, such as:
- magnets;
- dolls;
- hair clips in the form of flowers, butterflies, hearts, etc.;
- gift packages.
Thanks to the malleability of this ornamental material, even a novice craftswoman will be able to create something special from it, for example, a bouquet of flowers. Finished products, gigantic or very small, are distinguished by special realism and accuracy. The whole process of creating such crafts consists in drawing a stencil, followed by cutting and shaping the petals of one flower. It is better for beginner craftswomen to print ready-made templates. The list of necessary materials and tools for foamiran crafts includes the following:
- floral wire;
- cardboard;
- iron;
- glue gun;
- pencil;
- scissors;
- foamiran blue, yellow, white and other colors that are required in a particular master class;
- thick needle;
- foil;
- satin ribbon;
- additional decorative elements;
- acrylic paints;
- felt-tip pen;
- toothpick.

Roses from foamiran
In this master class, you can create a bouquet of yellow tea roses with delicate green foliage. To do this, follow the following step-by-step instructions:
- Take a piece of cardboard or thick paper, draw on it diagrams of 4 petals of different sizes. Set the dimensions of the largest one, depending on what size you want to make a bouquet.
- Cut the petals according to the pattern, then circle them with a thick needle on the foamiran. The smallest should be 10, and the rest - 8 each.
- Shape the foil into 5 drop-shaped blanks. Then put them on the floristic wire, cut into pieces.
- Preheat the iron and place a petal on it for 2 seconds, then immediately twist it in 2 opposite directions. Next, straighten and gently stretch the center. Do this for all petals.
- Glue the foil blank in the middle of the largest leaf, fix the upper part in the center with a corner. It will be an unopened bud. Glue the second element in the same way, it should fit snugly against the foil. Next, fasten the remaining parts, making them already more open.
- Form all the other roses, making unopened or already blossoming buds.
- Take another sheet of cardboard, draw sepals on it, cut them out, and then transfer them to a sheet of green foamiran. Cut the finished elements along the edges, repeating the fold lines.
- Twist the sepals and straighten them, like the petals, then string them on the same wire, and glue them to the small buds.
- Collect the bouquet by gluing individual buds, decorate it with leaves, wrap the rest of the wire with a satin green ribbon, securing it with glue.
Lily from foamiran
To create a lily, you need a white and green fom. Additionally, you will need stamens, pestle and felt-tip pen. The sequence of creating such crafts from foamiran is as follows:
- Draw and cut out a blank lily petal from cardboard. The length of the part should be approximately 6 cm. Make 6 such blanks. From green, make 3 leaves.
- On both sides, darken the elements with felt-tip pens.
- Heating the parts with an iron, give them a more realistic shape, draw veins with a toothpick.
- At the base of the leaves, put a few dots with a brown felt-tip pen.
- Make pistils and stamens from wire and small pieces of foma, painted black. Collect them in a single composition.
- Glue the first row of 3 petals around the stamens. Then in a checkerboard pattern all the rest. Attach green leaves at the bottom.
Snowdrops from foamiran
It is very easy to make crafts from foamiran in the form of a bouquet of snowdrops. Templates for it are made like this - you need to draw a heart 1.5 cm high and a drop of 2 cm and remove their pointed ends. These will be stencils for the main parts, it remains to cut them out of cardboard. With an awl, needle or toothpick, circle the blanks on the fom, making 3 pieces of each element. Further instructions for creating crafts are as follows:
- Heat the petals over the candle to give them volume.
- Form 3 stamens from a small foma rhombus, fix them on the floristic wire, previously cut into pieces.
- Color the top edge of the top-sized petals with pastels or green eyeshadow. Glue them around the stamen.
- Then decorate the flower with large petals, combining their edges with small ones.
- Wrap the wire with green teip tape, fix it with glue.
- For the leaves, cut out pieces of random sizes from green foma, glue a few to each flower, and then combine everything into a bouquet.
What can be done from foamiran
Foamiran flowers decorate shoes, bags and clothes. They are also used to decorate the interior with paintings, panels or other interesting elements. Foamiran crafts for any child will be an interesting activity. It can create appliqués, toys, magnets and more. Scrapbooking is a separate area of use of such material. Do-it-yourself foamiran hairpins look original. Especially often they are used by brides, because ready-made flowers will not wither, unlike living ones.
Foamiran toys
One of the actively developing areas is the manufacture of foma dolls. It has nothing to do with the technology of creating flower arrangements. Judging by the reviews of needlewomen, beginners in this area should order raw materials from a Chinese manufacturer, because their product is denser and brighter. It is better for making dolls and other toy crafts.
Foamiran dolls
For one of the simple toy craft options, you will need black, flesh, and red Thomas sheets. Additionally, you need the same material, but with some kind of print. Also prepare 3 foam balls with a diameter of 40, 50 and 75 mm. Instructions for making crafts from foamiran sheets are as follows:
- Print the pattern shown in the photo, cut out all the details on it.
- Place the largest ball on a stand, then top with a heated foma sheet and pull the edges down to about halfway up the ball. Remove the excess, repeat the same with the flesh-colored sheets and glue both parts. Make a neat seam.
- Fold the body pattern with a cone, insert half of the smaller ball there, glue it with a panty template.
- Paste over 2 bamboo sticks with body fom.
- For shoes, glue the halves of the medium balls with the remains of the smallest ones, also decorate them in flesh color. For the sole, glue black fom sheets to the bottom, and then cut along the contour of the shoe.
- Put your head on a toothpick, connect it to the body, glue your hands, a dress, attach your legs.
- Make a tail out of black foma, complete the craft with details, draw a face.
Christmas tree for the New Year
The next master class is also very simple, so even beginners can handle it. He describes the creation of the Christmas tree. The sequence for creating crafts is as follows:
- Cut a green foamiran leaf into 2 cm strips.
- Make a fringe out of them, making cuts, leaving 3-5 mm to the edge.
- Heat up all the strips with an iron.
- Fold a sheet of cardboard into a cone, fixing it with a stapler.
- From the bottom up, glue the craft with green fringe, then decorate the Christmas tree with red beads.
Jewelry from foamiran
Floristic crafts from foamiran are used not only as substitutes for natural flowers. They are also used to decorate hairpins, brooches or headbands. In general, almost any jewelry can be decorated with foamiran - hair ties, ribbons, combs or crab will look great with this design. Explore a few of the workshops below and try to create one of the decorations yourself.
Camellia-brooch from foamiran
Brooch is a stylish and refined accessory. It can be made independently in the form of a camellia flower, which will require lemon and green foamiran. The same colors need to take a pastel. Additionally, it is worth preparing the basis for the brooch. The work is as follows:
- Draw and cut out patterns of leaves, taking an amount that is 2 times more than indicated in the photo.
- With a toothpick, transfer everything to Thomas sheets. Next, cut out all the details.
- Each leaf is tinted with dry yellow pastel.
- For the core of the flower, glue a foil ball with foamiran.
- Heat each petal with an iron, give a realistic shape. Repeat the same with the leaves.
- Paste the core with small petals, and place the rest in a checkerboard pattern, moreover, freer than the previous ones. Attach the last 2 generally with a convex part from the center.
- Glue the green leaves, then use a thermal gun to fix the flower on the base for the brooch.
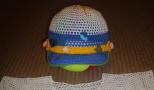
Hair ornaments from foamiran for hairpins or elastic bands
For any elastic band or hairpin, you can easily and quickly make an additional decoration in the form of a small flower. For example, take foamiran of pale purple and white colors, then use the following instructions:
- Cut out 3 circles from purple sheets, making the diameter of each next 5 mm smaller.
- Cut each element into 6 sectors, while slightly short of the center.
- Heat the parts with an iron, give them a rounded shape, then glue, aligning the sheets in a checkerboard pattern.
- Cut a small piece of white fom, make a fringe on it, glue it in the middle of the flower, and attach a bead on top.
 Five-minute blackcurrant for the winter
In this master class, I will tell you how to make beautiful leaves from marshmallow foamiran without mold. To make the leaves more natural, we will use live plants. Also in this MK I will tell you about how to fix the lithon to foamiran leaves without glue. So, let's begin.
What do you need to make beautiful foamiran leaves?
Let's start the master class with a list of necessary materials:
- marshmallow foamiran green;
- green oil pastel of all tones and a sponge;
- sheet of white office paper
- Litons No. 26;
- teip tape;
- iron;
- pouring fresh flowers.
Photo of leaves of fresh flowers that we will need.
In summer, a large variety of living leaves. And you can use it when working with foamiran. Here is the sheet I made. It can be used in your work without using molds. How to do this, I will show you in working with marshmallow foamiran.

This is the second sheet I took.
Photo of finished foamiran leaves

These are the leaves we will be making.
Master class on making leaves from foamiran: detailed instructions

But in the beginning, I want to remind you a little how to make leaves without mold and from Iranian foamiran using live leaves, so that you can see the difference in technology when working with marshmallow foamiran. We take a living leaf and a piece of Iranian green foamiran. And through a rag we iron the sheet well with an iron, just do not overheat.

Then we cut out along the contour, the texture of the sheet was printed on foamiran.

When working with marshmallow foamiran, we take office paper, a piece of foamiran and a sheet that we wanted to make, and more litons.

We fold a piece of foamiran in half and place a lithon between it so that it coincides with the central vein of the leaf. We put the sheet on the foamiran, cover it with office paper and iron it well, bake it. Then let cool, remove the paper and sheet.

We got such a sheet, since marshmallow foamiran tends to stick together and thin when heated, we got a very thin leaf and immediately on the lithon.

So you can make any leaves from marshmallow foamiran. Here again I will show on the example of another type of sheet. We take foamiran, bend it in half, place a liton inside.

We put a sheet on top so that the central vein coincides with the lithon.

We cover with office paper and iron.

Let cool and cut out the leaf.

Here is the back of the sheet.

Since the green marshmallow foamiran has a very bright light green color, you will have to work hard and use several shades of green oil pastel for tinting to get the desired shade. We apply tinting with a sponge, blending well.

This is the sheet we received.

Litons of leaves are also tinted with oil pastels or processed with teip tape. Here we made such leaves from marshmallow foamiran without molds and glue.
Such foamiran leaves can be used to decorate wedding and interior bouquets, making a beautiful “skirt” out of them. In addition, the leaves look beautiful on foamiran brooches and other jewelry. Elongated leaves look good with, wide leaves can be used for. Using the leaves of fresh flowers, you can make roses, orchids, peonies, dandelions, maple leaves and fern leaves pour with your own hands without mold. The main thing is to collect fresh green leaves, and until they wilted, use them as a mold or template.
Our kindergarten is actively preparing for the autumn holiday, and we, the parents, help it in this.
As a responsible parent, I volunteered to make pins in the form of autumn leaves for the children so that our group would be the most beautiful on this holiday.
The leaves turned out wonderful: bright, light and very similar to real ones.


The fashion model is my favorite five-year-old son Temochka.
How to make such wonderful pins, you will learn from my most detailed master class! So, from the start, let's go! Part #1:

For the manufacture of leaflets, we need foamiran of autumn shades. I took olive, burgundy, coffee, yellow and orange.

Cut out paper sketches of autumn leaves. To do this, I collected different leaves from the Internet, adjusted them to size (so that they looked beautiful on the children, were not huge), printed and cut them out.

We distribute the sketches: which of which foamiran we will make.


Slowly and methodically circle all the leaves with a regular toothpick.

Cut out blanks with scissors.


Some leaves are additionally processed with curly scissors.

We cut out complex-composite leaves sheet by sheet, i.e. each component separately.


To imitate wind-worn holey leaves, we will make several holes on our blanks. The holes should not be even, so the awl will not fit. I came up with the idea of making them with a broken toothpick (and the crooked it breaks, the better).

You can paint foamiran with anything. I like to do this with Winzor & Newton oil paint, Winton and Artisan series (fine pigment, evenly applied, Artisan is a water-soluble oil, i.e. can be washed off with plain water).

We will apply the oil with a regular sponge. Very handy construction sponge for windows (buy once and use for a lifetime).


We take the leaves of yellow base color. We emphasize the edges with Indian red, in some places we tint with green (be sure to go through the holes to further emphasize them). Do not forget about the reverse side (it also needs to be painted).


Variant with burgundy, orange and brown.

It's orange, brown and white.

Brown and burgundy.

And in this leaflet, warm shades are compatible with green.

Orange and burgundy.

Painted yellow blanks.


To make the edge more shabby, burn some parts of the leaves with a lighter. Be careful, foamiran can catch fire, but the flame is easy to extinguish by simply blowing it out.


Similarly, we tint all the cut blanks. It's easy to match colors by looking at photos of live leaves on the Internet;)

Preparing a spray solution. Acrylic paint is slightly diluted with water. I used acrylic in two colors - dark purple and green.


Using a toothbrush and your finger, spray the leaves. Dry and repeat the same on the reverse side.

To make the leaves look like real ones, they need veins. To imitate them, we need special molds.

We put the iron on maximum, turn off the steam. We take the mold in one hand, the future sheet in the second. We apply the sheet to the hot surface of the iron and ...

... and immediately, without wasting a second, we apply hot foamiran to the mold, trying to combine the central vein with the center of the sheet. We press with our fingers.
The mold in the photo is the most popular and most frequently used when working with foamiran. If you don't have one, be sure to buy it! I recommend!
This mold is called universal, because. with it, you can make not a certain leaf of a certain plant, but a lot of leaves. There are a lot of leaves with such a grid of veins and it will definitely come in handy for you.

Almost finished birch leaf.

For leaves of this type, we apply each half-petal separately to the iron and print it separately on the mold. Only in this way can a radial grid of veins be obtained.

For the manufacture of cuttings from the leaves, we need floristic wire No. 22. For complex leaves, the components of which we cut out separately, we will use a thinner wire No. 28.

For each leaf, we separately try on the wire and bite off the desired length with wire cutters. In order for the pin to have a rigidity rod, the wire will need to be glued from the very top of the sheet (if we made leaves into a bouquet or into a wreath, then the wire would not reach the middle).


Glue pieces of wire to the leaves with cyanoacrylate instant glue. To do this, grease the wire with a toothpick and press it in the center along the sheet.
If you smeared the wire with glue carefully, then you can press it with your hands. But often the glue appears out of nowhere and instantly glues the fingers together. Therefore, it is still more convenient to press the wire to the sheet with a clean toothpick.
Continuation of this master class in Part No. 2
P.S. If you liked this master class, please put your like in the upper right corner (the "like" button). I will be very grateful!
foamiran, wire, teip tape
Foamiran is a very plastic material, so decorations from it are airy and weightless. Today I will tell you how to make foamiran leaves according to a template (mold) with my own hands.
We will need the following materials and tools:
- Foamiran;
- Scissors;
- Mold (template) leaf;
- Toothpick;
- Iron.
You can find some of what you need at home or in the nearest store. You can buy many materials for needlework in my store in the materials section.
Watch the video of the master class.
Description and order of work

Using foamiran leaves
And so, get acquainted with the new material for needlework - foamiran. Someone has already heard about him, someone has already worked with him, and someone sees him for the first time. You can learn more about this unique material in the article "Plastic suede".
The leaves are the perfect complement to any flower or berry arrangement. It can be a flower brooch or a headband with flowers, which you can see in my online store.
My decorations with such leaves
A master class of foamiran leaves will be useful when creating many decorations. For inspiration, I propose to look at some of my works in which I used this technique. This is not all where you can apply the knowledge gained. I am sure you can make very beautiful leaves that cannot be distinguished from real ones.
|
|
|
|
|
|
|
|
|
|
A plastic foamiran peony is a rather lush, beautiful bud that even a novice master can make.
To conduct the MC, we need the following types of materials:
- Porous foamiran. To make the craft as realistic as possible, purchase material no more than 1 mm thick. We need a dark green, dark pink and light pink canvas.
- Fixation teip tape, which can be light green or green.
- Acrylic water based paints. To make the artificial flower interesting and as realistic as possible, get a dark pink, marsh and yellow shade of paint.
- Volumetric thick wire that will bend well, with a diameter of 1-1.5 mm. It will be needed to form the stem. For leaves, you need a small piece of floral or thin wire.
- A set of art brushes, as well as foam rubber, from which you need to make a small sponge (or sponge).
- Manicure scissors and a standard glue gun. You can use any manicure tool that will easily cut foamiran.
- A beautiful mother-of-pearl stone, a voluminous bead or a piece of foil, from which the core of the bud will be formed.
We also need a pattern that can be printed or hand drawn. With its help, we will form the petals and components of our bud. When everything you need is on the table, you can start creating a peony step by step.
- Cut flower parts according to our pattern.
- A - 10 light pink petals;
- B - 10 petals of a light pink shade and 5 blanks of a dark pink color;
- C - 10 parts of a light pink shade;
- D - 5 dark pink petals;
- E - 5 dark pink parts;
- Z - 3 leaves of a dark green hue;
- M - 6 sheets of dark green color;
- K and L - 5 gluing sepals of a dark green hue;
- F - a blank in the form of a sun with rays, from which we will form an interesting core with imitation of stamens.From the existing image, we cut out the pattern, transfer it to a light pink foamiran and cut out a circle. After that, cut the rays with sharp ends.

- Shading leaves and petals
Using acrylic paint, we make a light tinting of the petals of our peony, trying to get the effect of a non-uniform color (sometimes darker towards the edge of the petal, then darker closer to the base). To do this, we need a small brush with which we paint over all the petals on both sides.

The second stage is the creation of "reviving" leaves. For this, we also use the method of manual tinting. With a darker green paint, we paint over our foamiran leaves only on one side, and then draw the central veins in the center of the trefoil, distributing the paint from the center to the edges of the workpiece.

- Corrugation of leaves and petals
The initial stage will be the corrugation of the petals B. We fold the workpiece in small folds according to the "accordion" principle.

- flower assembly
We are preparing the base on which many peony petals will be fixed. To do this, we form a dense ball from foil, the diameter of which should not exceed 1.5 cm. If you decide to use a bead, then make sure that it has a wide enough hole. We pierce a hole in the foil ball, into which we fill the glue and immediately thread the prepared wire into the hole.

We string the workpiece G onto the wire and tie all the upper parts with a thread, placing them above the bead.
We dip the tips of the stamens in yellow acrylic paint, after which we attach 10 petals A to them, using a glue gun for this.
We fix the petals B, folded like an accordion at the base, so that small folds are obtained. In this way we fix 10 light pink and 5 dark pink petals.
The next row we glue 5 petals C, and behind them - in a checkerboard pattern 5 more of the same blanks.
The pre-final stage will be gluing five petals D in a checkerboard pattern in relation to the previous ones.
And the creation of the final row of the 5 largest petals E.
We fix the sepals and begin to collect the leaves as shown in the photo.
We decorate the hairpin with a lush poppy
Red foamiran poppy is a great way to decorate any hair accessory or diversify a flower bouquet consisting of field plants.

To create it, we need:- dense foamiran of black, green and red hue;
- acrylic paint (red and white);
- bright pastel and sponge for tinting;
- simple threads, a piece of foil, an iron and curly scissors;
- hairpin-machine without decorations;
- glue, a manicure stick or a wooden toothpick, as well as phlox powder.
When all the materials are ready, you can proceed to the master class. To do this, follow the instructions below.
We draw by hand paper templates in the amount of 8-16 pieces. We need 4 small blanks - 5.5 * 4.5 cm, as well as 4 large ones - 7.5 * 5.5 cm.

We cut a strip of black foamiran and process one side so that we get a fringe.
We make the base from a ball of foil, the diameter of the workpiece is approximately 1.7-2 cm.
We tint our petals on one side, using a sponge for this.
Smooth out sharp corners with curly scissors.
Lightly touching our petal with a sponge, we apply white paint on one side to the lower part of the petal.
Cut out a circle from green foamiran, put a foil ball in the middle and begin to form a poppy head. We tie the ball with a thread as shown in the photo.
Cut off the excess thread. We turn the ends over (turn out) and glue them. You can slightly tint the core first with red and then with white paint.
We start assembling the flower by gluing the fringe.
We form poppy petals by heating the material on the iron, which is in the “silk-wool” mode. We fold the warm blanks with an accordion, twist and slightly stretch the middle. We do this with all the petals.
We paint the fringe a little white. We begin to glue the petals overlapping, forming rows. First 4 petals in one row.
Then we glue the large petals below the first row by about 1-2 mm, also overlapping a little.
We cut out the leaves and apply a texture to them, tinting with paint and shading it with a sponge on both sides.

Glue the leaves, sprinkling them with phlox powder.
The flower is ready. Now it remains for us to glue it to the automatic hairpin using a hole punch or glue. You can do your hair!