Kanzashi Christmas decorations from ribbons in training lessons. Master class "New Year's toys in the technique of kanzashi DIY Christmas decorations from ribbons
But in this article we will talk about New Year's crafts from satin ribbons. Crafts can be simple or made using a special Japanese technique - kanzashi.
Herringbone
Let's start our crafts according to tradition with the symbol of the New Year - from the Christmas tree. Someone prefers to put up a big Christmas tree, but for someone such a pleasure is an unaffordable luxury (pets or small children consider it their duty to overturn a forest beauty decorated with lanterns and New Year's garlands). It's okay, you can decorate the apartment with a miniature Christmas tree, which can be made from satin ribbons.
#1 We make a Christmas tree from ribbons with children
If there are small residents in the house, they must definitely participate in the decor process. In addition, joint creativity is a great time spent! Every kid can make such a simple Christmas tree from a dry stick and different ribbons.
#2 Miniature Christmas tree made of ribbons
And here is a more complex version of a Christmas tree made of ribbons. Such crafts can decorate not only the house, but also, for example, the desktop. For the manufacture you will need ribbons, a foam cone blank, a lot of safety pins and a bow for the top. See the step-by-step master class in the picture below.

#3 Christmas tree made of ribbon and beads
You can make a Christmas tree from a ribbon, combining it with large beads. Such a craft can be hung on a real Christmas tree or given to someone as a souvenir. See step by step photo instructions below.

#4 Christmas tree in kanzashi style
And here is a mini Christmas tree made using the kanzashi technique. You will have to tinker with such a craft, because Japanese technology is for patient needlewomen. This craft will take a lot of time and effort, but the result is truly impressive! Satin ribbon petals are glued onto a paper cone with glue. Additionally, the finished tree can be decorated with beads. By the way, the Christmas tree does not have to be monophonic, you can combine colors to your taste.

#5 Christmas tree made of flowers in kanzashi technique
And here is a craft very similar to the previous one, there is only one difference: Christmas tree No. 4 is made from individual petals, and this Christmas tree is made from flowers. First you need to make petals from ribbons, then glue the flowers (5 petals each), and only then glue the flowers to the paper cone. See step-by-step instructions with photos below.

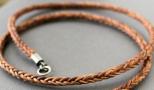
#6 Kanzashi herringbone hairpin
Using the kanzashi technique, you can make various decorations, in particular hair clips. For such a hair clip you will need: a hair clip, ribbons, beads. How to make a hairpin, see below.

#7 Herringbone ribbon hairpin
Here is another original way to decorate a hair clip with ribbons. Get a miniature Christmas tree that perfectly complements the New Year's look. How to make a hairpin, see the picture below.

#8 Hairpin herringbone
And you can also decorate a hairpin in such a simple way: with an ordinary narrow ribbon and a star-shaped bead. Ordinary hair accessories are so easy to make truly festive, and our step-by-step master class will help you with this.

# 9 Kanzashi Christmas tree from a ribbon - a souvenir for the New Year
#10 Herringbone from ribbons
Look for more Christmas trees:
Snowflakes
From ribbons, especially using the kanzashi technique, snowflakes of incredible beauty are obtained. You can decorate not only the room with such a craft, a snowflake made of ribbons can be hung on a Christmas tree or used as a decoration.
#1 Simple kanzashi snowflake
It is best to start your creative journey in kanzashi with simple crafts, such as this snowflake. You can master two types of sharp petals without much difficulty. By the way, you can glue the petals in your own way. Well, look at the author's version of the step-by-step MK.

#2 Another simple kanzashi snowflake
And another option is not the most complex snowflake using the kanzashi technique. By the way, such crafts can be fixed on a headband or hairpin and complement the New Year's look with an unusual handmade decoration.

#3 Snowflake kanzashi on the headband
Need to complete the image of a small snowflake? A snowflake using the kanzashi technique on a rim will cope with this task with a bang. Step-by-step MK in the picture below.

#4 Kanzashi snowflake with several types of petals
And this craft is more suitable for experienced needlewomen. In the manufacture of a snowflake, a large number of petals are used, the manufacture of which requires special skills. Well, if you are confident in your abilities, then watch MK and create!

#5 Snowflake from ribbons and beads
And here is a variant of a kanzashi snowflake with bead decor. In addition to painstaking work with ribbons, you will also have to work with beads and weave a small flower. Please note that this craft provides for several types of petals, each of which has soy manufacturing features. See the picture below for a step by step tutorial.

#6 DIY snowflake from ribbons
Snowflakes made using the kanzashi technique look unique, but a snowflake looks no less impressive from pieces of tape. For manufacturing, you will need a ribbon and a lighter (you can use a candle) to solder the parts.

#7 Christmas tree toy Kanzashi Snowflake
#8 Double Sided Satin Ribbon Snowflake
#9 Christmas kanzashi snowflake with swirls
#10 Headband Snowflake kanzashi from satin ribbons
See more snowflakes in the article:
Wreath
The Christmas or New Year's wreath is an exclusively Western tradition that has come from Hollywood films into our homes. Well, for those who accept Western values, we have prepared several master classes on creating wreaths from ribbons.
#1 Christmas wreath of bows
A very simple ribbon wreath for the lazy. For manufacturing, you will need a base and ribbons of different colors. Tie ribbons in bows around the base and the wreath is ready!

#2 Wicker ribbon wreath
A wreath of ribbons can be woven. Such a product looks very impressive, but in fact there is nothing complicated in manufacturing. Follow the step by step instructions and you will succeed!

#3 Miniature Christmas wreath in kanzashi technique
A mini wreath can be made from kanzashi petals. You need to make basic petals from ribbons, glue them in threes and connect them into a circle. The finished wreath can be decorated with a miniature bow.

#4 Miniature wreath of ribbon and beads
A miniature wreath of ribbon and beads can be hung on a Christmas tree as a decoration, or you can give it to someone as a handmade New Year's souvenir. For the manufacture you will need fishing line, ribbon and beads. You can also use additional decorative elements, such as a pendant and a bow.

#5 Baby Ribbon Wreath
Surely in kindergarten they gave the task to make some New Year's crafts with children. Take note of this simple Christmas wreath. You will need: a base for a wreath, a lot of pieces of different ribbons, glue.

#6 Christmas wreath of satin flowers
And here is a version of the New Year's wreath of satin flowers. Flowers are very realistic and it seems that the manufacture of such a wreath will take a lot of time. Actually it is not. Making such a craft from ribbons is quite simple. You can verify this through MK.

#7 Ribbon Wreath: Making Christmas Crafts with Kids
And here is another great version of the New Year's crafts that the kids can handle. You will need: a base, a lot of ribbons of different colors and sizes, scissors. cut the ribbons into strips of the same length and tie in knots around the base. The wreath is ready!

#8 Simple satin ribbon wreath
very simple wreath of satin ribbons. For manufacturing you will need: foam base, ribbons, safety pins or glue. Wrap the blank with a ribbon and decorate at your discretion: with a bow, a snowflake, or leave it like that.

#9 Kanzashi Christmas Wreath
#10 New Year's wreath "Snowman" from ribbons
You'll like it:
Balls and other Christmas decorations
Ribbons make very beautiful Christmas tree decorations, for example, balls, bells, cones, lanterns and more. We have found for you simple and complex MK, with which you can create the Christmas tree of your dreams!
#1 Simple Christmas ball of ribbons
To create such a Christmas ball you will need: ribbons, safety pins, foam blank. Roll the ribbons into a ring and secure with a pin to the workpiece. Continue until the entire ball is decorated with ribbon rings.

#2 Christmas ball made of satin ribbons
To make such a ball, you will need: a foam blank, a tape cut into strips slightly larger than the diameter of the blank, two safety pins.

#3 Christmas ball made of ribbons in artichoke technique
And here is a slightly more complicated version of the craft. The real difficulty lies in the fact that you have to spend your time. You can arrange the colors to your taste, and you can learn the secrets of the artichoke technique from the step-by-step MK.

#4 Christmas ball of ribbons
And here is another option for decorating the workpiece with a narrow ribbon. In this MK, glue is used instead of safety pins, and the tape itself does not need to be cut into pieces. The tape is wound obliquely through two points on the surface of the ball. Each time you pass the tape through one of these points, drip a drop of glue and fix a new layer. Step by step photo instructions are below.

#5 Artichoke style cone
From ribbons, you can make not only a ball, but a bump, for example. To do this, you will need a special blank, ribbons of a suitable color and safety pins in large quantities. Cut the ribbons into identical squares, wrap them into a triangle and fasten them to the workpiece with a pin.

#6 Ribbon cone
And here is another version of the cone of ribbons, that's just easier to manufacture, but no less spectacular. For manufacturing, you will need a blank made of cardboard, a narrow ribbon of a suitable color and glue. Step by step process of making crafts is shown in the photo below.

#7 Icicle on Christmas tree from ribbon
A very simple craft. To make such an icicle, you will need a narrow ribbon, a pencil and a thread. Wrap the tape around a pencil, fasten and leave overnight. In the morning, remove the tape, sew on a thread and you can decorate the Christmas tree!

#8 Ribbon bell and flashlight
#9 Lanterns kanzashi
#10 kanzashi Christmas tree cones
#11 Christmas tree balls from a narrow ribbon
#12 Kanzashi Christmas balls without base
#13 Christmas ball kanzashi
See more Christmas ball ideas:
Angels
Angels for the New Year also came to us from the West. However, New Year's holidays are followed by Christmas and if your family is one of the believers, then why not make crafts for the future, especially since very cute angels are obtained from the ribbons.
#1 Simple ribbon angel
If you are doing needlework with children, especially those of preschool or primary school age, then be sure to take note of this simple, but all original ribbon craft. You will need ribbon, a stapler and beads.

#2 Angel for Christmas tree or for table decor
And here is another very interesting craft that you can hang on a Christmas tree or decorate a Christmas table. You will need a wide ribbon, a bead, a piece of wire (for a halo) and decorative elements.

#3 Kanzashi angel
#4 New Year Angel
#5 Mini Christmas Angel Kanzashi
Bow
What is the New Year without gifts? What is the main thing in a gift? Well, of course, attention and packaging! A beautifully wrapped trifle will bring much more pleasure! A chic bow will help to complete the gift wrapping, which you can make with your own hands from ordinary ribbons.
#1 Christmas ribbon bow
A variant of the classic Christmas bow made of thin ribbons. This bow will be a great addition to any gift. How to tie a Christmas bow from ribbons, see the photo instructions.

#2 Double Ribbon Bow for Gift Wrapping
Or here is another original version of the double bow. It is tied quite simply, but the impression is indelible! Step-by-step MK can be found below.

#3 Bow flower
A delicate bow in the form of a flower will be a great addition to a gift for a loved one: mother, sister, best friend. You will need a satin ribbon, a needle and thread, and a bead for the core. See below for how to make a bow.

#4 Big ribbon bow
And here is a big bow to decorate a massive gift. You can decorate absolutely any gift with such a bow, for example, for a beloved man or work colleague. Looks cool and is very easy to do. Step by step photo instructions are below.

#5 Narrow ribbon flower bow
From a narrow ribbon with glue and a button, you can make a charming flower bow. The perfect addition to a gift for a best friend, sister or daughter.

#6 Do-it-yourself voluminous bow
And here is a version of a universal bow that can decorate any gift. You will need a ribbon and our master class.

#7 How to tie a simple bow
#8 How to tie a fancy ribbon bow
You will also like Christmas packaging ideas:
Other crafts
You can make an incredible number of a wide variety of crafts from ribbons and it is simply impossible to collect them all in one place. But we tried to find as many different options as possible so that you can be inspired and create your own masterpieces. And next year, perhaps your master class will be on our website!
#1 Crown
Crowns for small snowflakes and princesses can be made from ordinary ribbons. The crown can be made in the kanzashi technique (for more experienced craftswomen) or in a simpler technique.

#2 Crown of ribbons and tulle
#3 Kanzashi crown from a narrow ribbon
#4 New Year's crown with your own hands
#5 Postcard
From ribbons you can make a New Year's card. For example, folding a narrow ribbon in the form of a Christmas tree. You can decorate with beads or colored buttons.

More Christmas cards:
#6 Candy
As a mini souvenir for the New Year, you can make sweets from ribbons. You will need a narrow ribbon of two or more colors, and then it's a matter of technique!

#7 Christmas garland of ribbons
From ribbons you can make a cool New Year's garland for room decor. To create you will need wide ribbons of different colors and a thick thread. Ready-made flags can be glued to a thread or sewn on. But it takes a long time to sew by hand, so if you have a sewing machine, be sure to use its capabilities.

You may be interested in:
Help us become better: if you notice an error, highlight the fragment and click Ctrl+Enter.
If you have a hobby, you are fond of modeling all kinds of decorations, then you will definitely want to make some interesting model for decorating the Christmas tree before the New Year. If you are interested in models of Christmas decorations, then you have come to the right place. Beautiful Christmas decorations create a festive mood in the house. You always want to buy some kind of novelty before the New Year, so that it becomes the central detail of the festive Christmas tree. You can make such a product with your own hands, we offer three detailed master classes.
A Christmas toy in the form of a princess will win the hearts of girls, each of them dreams of being the most beautiful and most elegant on New Year's Eve. It will definitely happen. And on the Christmas tree there will be a miniature of a fairy-tale princess, which you can imitate.
This tutorial shows you how to make a Snow White Christmas decoration dressed in a ball gown. The main thing is to get a ready-made cabochon of a suitable theme, and a beautiful dress can be made from all kinds of ribbons and lace.
For a unique elegant Snow White you will need:
- felt base of a triangular shape of pink or red color - 6 * 6 cm;
- 15 pieces of satin ribbon of pale pink color - 1.2 * 4 cm;
- red lace track (cut the strip in half lengthwise), lengths will be used - 15.5 cm, 11 cm, 8 cm and 7 cm;
- 30 pieces of white half beads - 4 mm in diameter;
- 4 pieces of red ribbon - 2.5 * 7 cm;
- 4 pieces of white ribbon with lurex - 1.2 * 7 cm;
- 1 piece of pale pink ribbon - 1.2 * 3.5 cm (for winding the cabochon and highlighting the princess's waist);
- silver tire;
- cabochon Snow White;
- silver cord for the eyelet of a Christmas toy - 12 cm.
The right choice of cabochon is already half the success in such work. It will help create the look of a beautiful princess, and simple ribbons and lace will create a fabulous dress.
Christmas tree toy in the form of a princess in stages
1. The size of the toy directly depends on the cabochon. Usually such details are not large, so the given size of the template for the skirt is optimal. The flounces of the ball gown will be made from pale pink narrow stripes and lace tracks, and beads are needed for additional decor.

2. From pale pink satin stripes, make pointed petals. Bend in half at a 90 degree angle. Then bend again, highlighting the corner-house in the center. A pocket will be visible on the reverse side. This is the detail that is needed in the future.

3. Prepare a pink felt trapezoid. Cut the longest strip of red lace 15.5 cm long. Glue white beads in a row.

4. Glue the strip to the wide side of the A-line skirt, creating a beautiful ruffle (first frill), forming an even pleat.

5. Glue a layer of 6 spiky soft pink petals on top of the overlap.

6. Next, continue assembling the puffy ball gown, layering similar stripes, only they will decrease in length. For example, the third layer will be a red lace track 11 cm long with white beads.

7. The fourth layer - 5 pale pink petals, the fifth - red lace 8 cm long with beads, the sixth - 4 pale pink petals, the seventh - the last piece of 7 cm lace. Make the last neat fold at the top.
8. A beautiful puffy bow will be visible on the back of the dress. Prepare red stripes and white narrow lanes with lurex for modeling four loops. Combine them in length, bend and singe.

9. Collect a bow from four parts.

10. Now the main parts are assembled: the hem of the dress with flounces and a beautiful bow. Time to use the cabochon.
11. Glue the bow and the bottom. Glue a belt on the waist of the beauty, which is not only designed to decorate the entire product as a whole, but also hide the place where the main parts join. The belt will consist of a soft pink satin ribbon decorated with a silver splint.

12. Glue the ends of the lace to the center of the structure to make a loop. Top with a Snow White cabochon.
Your unique Christmas tree decoration is ready. The princess looks very cute, such an accessory will definitely take its rightful place among other toys.
Decoration for a small Christmas tree in the form of a snowflake
Before the New Year in all houses there will definitely be decorated Christmas trees, decorated with garlands, serpentine and tinsel. Someone prefers to buy a large tree, the length of which reaches the ceiling, someone modestly puts a small artificial fir tree on the table to bring a holiday touch to their room. And you definitely need to put something under the Christmas tree, so it's customary. Usually these are figures of Santa Claus and the Snow Maiden, or snowmen. We offer another option - a snowflake on a stand, which will perfectly complement the interior of a winter fairy tale. Consider in detail how to make a beautiful snowflake. Also, the accessory can also become a decoration for the Christmas tree, if you do not use a stand, but attach a loop of lace.

Consider separately the list of accessories that will be needed for the stand and for the snowflake top.
Stand materials:
- 1 piece of blue rep tape - 2.5 * 19 cm;
- 1 piece of openwork lace "Grid" white - 2 * 19 cm;
- foam reel from the tape;
- 2 circles of silver glitter foamiran;
- blue tire.
For a gentle snowflake:
- 6 pieces of blue satin and silver brocade - 5 * 5 cm;
- 30 pieces of white satin ribbon - 2.5 * 2.5 cm;
- 6 pieces of blue satin ribbon - 2.5 * 2.5 cm;
- silver color hugger - 1.8 cm in diameter;
- half bead of blue color - 8 mm in diameter.
Snowflake modeling is demonstrated using a white and blue elegant color scheme. Although you can make beautiful winter products using other ribbons. If your plans include creating a Christmas tree toy, then there is no need to make a stand, then simply ignore the first part of the accessories list, instead add a piece of silver lace or a thin satin ribbon.
Kanzashi snowflake in stages
1. To make a stand-drum, use a foam reel, silver glitter foamiran and a compass or circle template. Cut out 2 sparkling circles of the same size. You can attach the foam cylinder itself to the sheets and circle it twice so as not to blindly select the diameter.
2. Stick the silver circles on both sides of the cylinder. Prepare a blue rep ribbon and a white mesh strip. The dimensions indicated in the list are selected so as to cover the side wall of the drum without gaps. Also cut off 2 pieces of the blue tire.

3. Glue on the side wall first the blue rep, then the mesh. At the top and bottom, ennoble the adjoining bus. Cut off the excess. The stand is ready.

 ,
,

Tatyana Gudkova
For the manufacture of Christmas ball will be required:
foam sphere (I have a diameter of 14 cm);
Short Studs (about 350 pieces);
2 squares satin ribbon 5x5cm;
Green satin ribbon 25 mm wide, 5 m long;
White satin ribbon 25 mm wide, 5 m long;
2 beads or sequins to decorate the middle;
- satin ribbon for making a bow.
First, fix a square on the foam sphere satin ribbon.

Then cut satin ribbon in strips of 6 cm. We start to make from white stripes. From each rectangle, make a triangle by bending the upper right and left corners to the center of the bottom side. We fix the resulting triangles at the corners of the square, as shown in the photo.

Attach one more triangle between these triangles, maintaining the same distance between the vertices.

Now take the green stripes. We make the same triangles out of them and attach them between the triangles of the previous row.


Now change the color again ribbons. From this row, we fix the corners not only between the corners of the previous row, but also under them, as shown in the photo.

Continue until half of the ball is covered.
Do the same for the second half.

Now let's move on to the design. We close the joint between the extreme rows of triangles satin ribbon. You can fix it with hot glue. (hot melt adhesive). Glue a bead or sequin in the center of the initial square. Tie a bow at the top of the ball and glue ribbon, for which you can hang a ball on a Christmas tree.

I wish you patience and creativity in manufacturing!
Related publications:
"Bows from satin ribbons" Bows from satin ribbons look very impressive on any work done. In the first photo there are bows made specially.
I made such a beautiful swan from satin ribbons. I used this craft as a visual material in a literary quiz ..
Kanzashi flowers look great not only on hairpins, headbands or hair ties, but also on bracelets, necklaces, earrings, brooches,.
I did a "miracle", I can't call it anything else. I worked for a long time, burned my fingers with glue, but it's worth it, I just can't stop looking, I think.
Master class on the topic: "Heart for loved ones." Coming soon is Valentine's Day. On this day, I want to deliver to my loved ones.
I have already talked about how you can make a Christmas ball with your own hands, today I will continue my story and share how I made another one.
No other holiday has such a joyful and magical period of preparation as the New Year and Christmas. Today we invite you to recharge your batteries with anticipation and have a lot of fun creating Christmas balls for the Christmas tree with your own hands. Do not wait until the festive atmosphere itself descends into your home! Start getting inspired for 2019 now by creating special decorations for your home!
In the last article, we told you how to make . So now it's time to show 40 ways to make Christmas balls from ribbons, threads, fabric, beads, beads and other improvised materials and materials. Best ideas with step by step photos!
How to make Christmas balls from threads with your own hands (12 photos)
How can you make a beautiful Christmas ball of thread? The easiest and fastest way is to wrap an old Christmas tree ball with thick knitting thread or twine. Use glue to keep the thread secure. Complete the result with lace, ribbons and beads. DIY Christmas balls made of thread will look very vintage and romantic on the Christmas tree.


From the same thick threads, you can make DIY Christmas balls in eco style. All you need for this is glue or paste, a few balloons and twine. The beauty of this method is that you can decorate the received toys in any way (with branches, electronic candles, etc.) and give them any size. Do you want to make large Christmas balls with your own hands from threads? Then just push harder!


Finally, you can create stunning Christmas balls with thin sewing threads with your own hands. True, the process will take a lot of time, but just take a look at the New Year's balls of thread in the following photos! This is a real art, whose name is temari. We offer several ideas and schemes for beginners.


DIY Christmas balls from ribbons
Each Christmas ball made of satin ribbons will look very elegant and will only enhance the sparkle of your Christmas tree. In order not to waste a lot of time and effort, you can wrap a regular old ball with a narrow ribbon and decorate it with beads, sequins, ribbons or lace. The method is similar to decorating balls with threads, only the result will be more luxurious. See Christmas balls from ribbons in the following photos:


If you are diligent and patient, then try cutting the fabric into pieces and using needles to make chic New Year's balls from ribbons with your own hands using the step-by-step photos below.

 Also read:

It will be much easier to make Christmas decorations from pieces of fabric. You just have to stock up on styrofoam balls in the store to use them as a base.


DIY Christmas balls: decoupage decoration, beads and more
On the night of December 31st to January 1st, we not only celebrate the new year, but also see off the old one. Therefore, Christmas decorations and toys in a nostalgic style are always in great demand. DIY decoupage Christmas balls are a great way to bring the spirit and romance of the past into your home. Read more about the decoupage technique in the article. The secret is to thin old postcards or other paper well before sticking to the surface. Photo for inspiration:


Do you have a lot of old Christmas toys? See how you can update them and decorate Christmas balls with your own hands:


At the end of our article, we offer you a few more ideas for crafts - this time using transparent balls. Delight family members by preparing a New Year's ball with a photo inside with your own hands for everyone.

 Also read:
In addition to photos, you can decorate transparent Christmas balls with your own hands with pine needles, finely chopped paper, scraps of old garlands, etc.


Natalia Popova
On the eve of the holiday New Year, I wanted to make small souvenirs for the parents of my group. Since I recently discovered technology"kanzashi"(I knew about her for a long time, but now I myself am only taking the first steps in this field, I decided to take christmas toys on the Christmas tree in this technique. Hope, toys, made by me with great love, will appeal to both parents and children of my group, and they will be happy to decorate their Christmas tree with my gifts. So we need:
Satin ribbon 5cm wide. ;
Satin ribbon 2-2.5 cm wide (for bow);
Satin ribbon with a width of 0.5 cm-1 cm. (for loop and decoration);
Various beads;
Lighter (or candle);
Glue gun.
We take a satin ribbon of two colors, 5 cm wide.

We cut squares 5 by 5 cm. We need 12 of these squares of each color.

Then we turn triangles from squares.

Then we put the triangle one on top of the other.

We fold the double triangle so that one is inside the other.

We solder the corners and the base of the triangle with a lighter.


We make 12 such triangles.


We glue the triangles with a soldered edge to the center, insert a ribbon for the loop and decoration in the middle. decorate toy bows, beads to your liking. here's what happened to me.


There was a whole box of gifts.
Related publications:
Today is the most important holiday of our country. I congratulate all Maam residents on Victory Day and offer a Master class of St. George's brooch, which.
SUMMARY OF THE MASTER CLASS FOR TEACHERS ON THE TOPIC "DESIGNING THE EASTER EGG IN THE TSUMAMI KANSASHI TECHNIQUE" Performed by the educator: Dezhanova.
I had an idea to decorate the curtain tieback with a flower using the Kanzashi technique. I looked at various master classes on the Internet, I found many interesting ones.
Kanzashi is a wonderful technique that I have mastered recently. A little of your skill and you can make amazing flowers, hairpins, elastic bands.
PURPOSE: to introduce and draw the attention of children to the Russian folk toy - matryoshka; to instill love for the beautiful, for the Russian folk song;
The first flowers are very important, The first flowers will be only once, Let them disappear forever, But there will never be such! Good time.
Master class "New Year's toys from salt dough" Veselova Alexandra Vladimirovna New Year is a magical time for our children. And get ready.