Volumetric quilling hearts for a beginner in the interior. DIY Valentines: lace hearts made of paper using the Quilling technique
Today, the leading trend in handmade crafts is quilling. With its help, magnificent paintings and souvenir crafts are created that can be given as gifts or used to decorate the interior of any room. The compositions are made from rolled thin strips of paper of various colors.
Quilling is a simple and fun activity for everyone. It is affordable for the cost of the material, and consists of a set of tools. Get inspired to view step-by-step master classes with photos, diagrams and templates on making hearts using the quilling technique.


Prepare the necessary tools and supplies. They are sold on the shelves of any stationery store that specializes in handicrafts.
Materials for work:

Step-by-step work progress:
- Use sheets of paper in bright colors to make the craft fun. There are ready-made kits in stores, with strips of paper for work, although they are easy to cut yourself. You can also work with office or printer paper. Make strips out of it and paint with watercolors. The strips are cut to fit the ruler using a sharp breadboard knife.
- A two-pronged fork is suitable for this work, with the help of which you wind paper pieces into rolls. If you don’t have such a tool, use a toothpick after splitting it.
- To make a quilling heart, master the basic shapes:

Simple openwork heart
Here's how to make a simple valentine for a loved one or friend.
Take red and pink stripes, a jig and a tube of glue. 
- Make identical spirals in the form of drops from two strips, glue the edges.
Let the items dry. - Glue the blanks in narrow places to create a quilling heart.
- For the finished valentine, make a base from a piece of paper folded into the shape of a heart and glue it along the outline with glue.
- To make a pendant, twist another medium-sized spiral and glue it above the heart to the base. Thread a ribbon, chain or string into the hole in the center of the figure.
Another idea for using quilling hearts: decorating a Chinese tree with valentines.
When you learn how to make such a simple souvenir, move on to a complex one: a heart made of hearts.
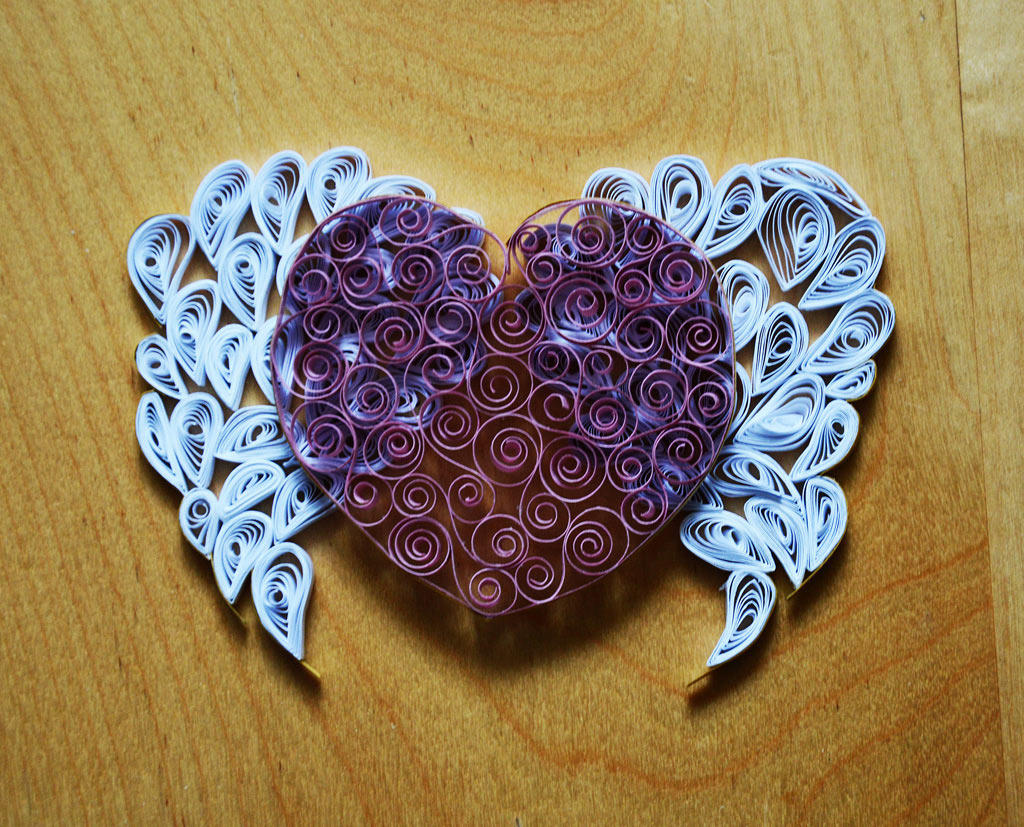
Winged Valentine
To form a voluminous heart in an openwork design, prepare scarlet, burgundy and light pink paper sheets, a device for twisting stripes and glue. 
The craft has angel wings, so it looks romantic. Detailed instructions for creating this valentine:
- Take a long strip and make a contour: fold the edges and trim off the excess. Glue the edges along the PVA contour.
- Make droplet spirals, two each in scarlet, pink, and burgundy.
- Glue the droplets together like you would on a simple quilling heart.
- Place the hearts in the center of the outline, and glue them touching sides, connect the adjacent edges of the hearts with glue.
- If the finished souvenir turns out to be too delicate, wind the spirals to fill the voids around the main parts.
- The heart is ready. It is glued to a dense base and used as a pendant or gift.
Postcard with video master class
There are different techniques for creating a card with a heart. Sometimes needlewomen combine scrapbooking with quilling. The master class looks at making a lace heart from a cardboard sheet and plain paper.
This tutorial uses the same tools as those previously discussed. Add a piece of thick cardboard and scissors with a shaped blade to create an openwork edge. 
If you are planning a three-dimensional craft, use corrugated paper.
Instructions with step-by-step photos:
- Draw a heart on a piece of cardboard and cut it out using scissors. Draw a heart shape in the center and cut it out. This is the basis for the postcard.
- From quilling paper, make the main rolls and a couple of free ones.
- Make 2 droplet blanks for the inner quilling of the heart. Glue them together as in the previous master class.
- Lay the base on a flat surface and place a heart of a couple of droplets in the center. Fill the rest of the space with rolls of basic and free shapes.
- Glue the adjacent parts of the rolls and the base, as well as the rolls and the heart together.
- Carefully move the composition so that it sticks to the surface and dry it.
- Glue the quilling heart onto the cardboard.
- Decorate the heart with sparkles, add buds of dried roses.
Quilling heart is an original part of a gift, or a component for a themed holiday. Showing imagination, but starting from the proposed options for the classic style, each master brings something new to paper crafts.
Application of quilling heart
Magnet - heart


Panels and postcards using quilling technique


Stencils for hearts


Quilling today is considered one of the most beautiful and at the same time affordable types of handmade. Under this name lies the technique of creating paintings or elements from thin strips of special colored paper rolled into rolls. Anyone can try quilling: this type of needlework does not require any special financial expenses or any superpowers. A minimal set of tools, a supply of suitable paper and inspiration is all you need to create an unusual souvenir, a heart using the quilling technique.
You should start quilling, or paper rolling as it is also called, by preparing the necessary tools and consumables. You can purchase them at any stationery store or shop specializing in handicrafts.
You will need:
- PVA glue,
- Quilling paper or thick colored double-sided or single-sided paper,
- ruler with round patterns,
- simple ruler,
- pencil,
- special tool holder for quilling,
- glue brush,
- scissors and a breadboard (stationery) knife.

Special paper is used for quilling; its density must be at least 80 grams per square meter. This paper is sold cut into thin strips.
Instead of quilling paper, you can use good office paper for a printer or thick colored paper for appliques - you will have to cut it into strips yourself and, if necessary, paint it with gouache or watercolor. For cutting, use a ruler and a sharp bread knife.
The quilling tool holder is a small two-pronged fork that can be used to easily twist a strip of paper into a spiral or roll. They are on sale, and if desired, you can use improvised means instead.
Instead of a holder, experienced needlewomen suggest using a toothpick with a split end, a large gypsy needle with the upper part of the eye cut off, or a similarly modified awl.
This handicraft will require a little skill on your part, which will easily appear if you try to create a few simple shapes, which in paper rolling are called rolls.
To create hearts of different sizes using the quilling technique, it is enough to master several basic shapes:
- Basic roll or a simple thick roll: place the edge of a paper strip between the teeth of the holder, press it against the index finger and turn the holder counterclockwise until the entire strip is curled into a roll. We coat the remaining edge (a couple of millimeters) with glue and glue the roll, after which we remove the element from the holder.
- Free roll: done in the same way as the basic one, but instead of a fork holder, we use a thicker base (pencil, marker, Chinese sticks) for rolling. After wrapping, we don’t glue the edges right away, but remove the roll and transfer it to a pattern of the required diameter so that the spiral turns loosen a little, and then glue the end together.
- Drop roll: wind a basic or free roll, remove it from the fork and lightly squeeze on one side so that the curl acquires a characteristic teardrop shape.
Such simple spirals, prepared in different colors and sizes, will allow you to create hearts of different types and levels of complexity.
Easy quilling heart: option for beginners
Want to make a quick and easy Valentine's card for your loved ones and friends? It is very easy. Take a couple of strips of red or pink paper, a fork holder and glue.

A simple master class on making a quilling valentine with your own hands:
- We make identical drop rolls from two strips and glue the ends of the paper together.
- Let the workpieces dry.
- We glue two pieces together in narrow places to make a heart.
The finished valentine can be placed in a base made of a strip of paper, folded into a heart-shaped shape, and glued along the PVA contour.
To make a pendant from such a valentine, make another small loose roll and glue it above the heart to the base. Thread a ribbon, chain or cord into the hole in the middle of the roll. Another use is to decorate a heart tree with these valentines.
After this, you can move on to a more complex figure: a heart of hearts.
Unusual heart of hearts: quilling for lovers
In order to make a large and beautiful openwork heart using the paper rolling technique, take paper of different shades: for example, scarlet, burgundy and soft pink and all the tools described above.
Step by step we create a heart from hearts:
- From a long strip we make the outline of the future heart: we bend it in the right places using a ruler and trim off the excess edges. Glue the edges of the outline with glue.
- Depending on the size, we make several small drop rolls, for example, two scarlet, two pink, two burgundy and so on.
- Glue the drops together as for a simple heart.
- We place small hearts inside the outline and carefully glue them to it with touching parts. Don't forget to glue the adjacent edges of the hearts together.
- If the finished product turns out to be too airy and lacy, twist several basic rolls and fill the gaps between the main elements with them.
The finished heart made of hearts can either be glued onto a thick base, or left in its original form and used as a hanging decoration or simply given as a gift.
Quilling heart: pattern for a beautiful Valentine
To create a beautiful card for Valentine's Day or just for your loved one, you can use quilling ideas in combination with other craft methods, such as scrapbooking. Let's try to make a lace heart from cardboard and paper.
To make it, in addition to the standard set of blanks and tools, take a sheet of thick white double-sided cardboard and small scissors (you can use curly scissors for scrapbooking - they will quickly allow you to decorate the border of the blank).

If you want to make your heart card three-dimensional, try using corrugated paper instead of plain quilling paper.
- Draw a heart on cardboard and cut it out with curly scissors or simply with a zigzag or jagged edges. In the middle of the cardboard blank, draw a smaller heart of the same shape and cut it out without cutting through the outer contour - this will be our basis for the postcard.
- From quilling paper we roll up basic rolls and several small free ones.
- We make two drop blanks for the inner heart. We glue them together as in previous master classes.
- We place the base on a flat surface and in its center we place a heart blank made of two drops. We fill all the remaining space with basic and free rolls.
- We glue the joining parts of the rolls and the base and the rolls and the heart together on PVA.
- We carefully move the structure so as not to stick it to the surface, and let it dry.
- Glue the resulting heart onto a cardboard blank for a postcard.
The heart can be additionally decorated with sparkles or small buds of dried roses.
Heart using quilling technique: design with chain rolls
You can also make an original heart using a more complex element - a chain. To do this, let’s master the roll chain itself: hold the strip as usual at the beginning and scroll, as for a basic roll, but only 2-3 curls, then take out the fork and place it at a distance of a couple of centimeters from the resulting “wave.” Again we scroll a couple of curls away from the existing one. Repeat for the entire length of the strip.

Scheme for making a heart from chains:
- We glue the base strip together with the edges and give it a heart shape.
- We make several chains of red paper, the length of the strip should be approximately twice as long as the length of the base strip.
- Apply glue to the side opposite the curls.
- Glue the chain along the contour from the inside of the base.
- We glue the next chain in the same way to the curls of the first, gradually filling the inside of the heart.
- For the central part of the composition, you can use a pair of drop elements or free rolls.
- Let the glue dry well.
Craft using quilling technique: heart for Valentine's Day (video)
Hearts using the quilling technique will become a beautiful part of a gift, an original decorative component for a themed holiday, or the basis for creating pendants and cards. Use your imagination, don’t stop only at the suggested options, and you can create a real masterpiece from simple paper!
Quilling is an amazing art of paper rolling, thanks to which simple material is transformed into extraordinary crafts. By folding narrow colored strips into intricate spirals in this way, you can create a variety of crafts. This article presents a simple and at the same time original master class “quilling heart”. Also given are two alternative options for making paper creations on a given topic.
Variants of the “quilling heart” craft
Paper crafts with a touch of romance can be created in several ways:
Formation of a minimum-sized product from individual strips;
Creating a flat craft by filling a space limited by a contour with small blanks;
Creating a figurative “heart” pattern from structural elements of various types by laying them out along the contour;
Decorating a voluminous thematic layout with small quilling details.
To obtain all of the listed products, as a rule, rolled strips of paper are glued to some kind of base. It is also possible to create separate structures in which the workpieces are connected only to each other. Typically, various pendants and keychains are made in this way, for example.

Let's start preparing for Valentine's Day! I would like to offer you this to add to your collection of “Valentine” ideas: openwork heart made using the quilling technique.
Despite all its ornateness and apparent complexity, this heart can be made together with children. Try it!
We will need the following materials and tools:
red quilling paper strips
quilling tool,
PVA glue,
a small thread or piece of sheet magnet.
To begin, take a paper strip 10-12 cm long and glue its ends together to form a circle.

Then we will give the circle a heart shape, making folds in the appropriate places.

The frame of our heart is ready. Next, take another strip and begin to wind it on the quilling tool. We literally do 2-3 turns. Then we take out the tool, insert the strip into it approximately 2 cm from the first turn and again wind the strip in the direction of the first turn. We repeat this several times until the strip runs out.

As a result, from a strip 29 cm long you should get a “curled” strip approximately 5 cm long (the length will depend on the number of turns you make).
Since we will not glue our openwork heart to any base to make it “airy,” we will coat the prepared “curled” strip with glue not from the end, as we did when making a desk calendar, but from the side.

After this, we will paste our blank inside the outline of the heart.

We make several more of these strips and glue them inside the outline until the entire space is filled.


This is how the openwork heart turned out. Light, tender, airy.

This could be a pendant, for example, for a car. And if you glue a small piece of a sheet magnet or a magnetic “puck”, you will get a romantic refrigerator magnet.


As you can see, making a heart is very simple. Even a seven-year-old child can handle this craft.
* * *
Interested in the topic of quilling? Subscribe to updates , to receive announcements of new master classes in your inbox and get acquainted with new ideas and traditional techniques of this amazing paper art!
See you again in KARTONKINO !
This time “Cross” will tell you in detail and show you how to make valentines with your own hands using the Quilling technique. These paper valentines are quite simple to make and will help you beautifully express your feelings!
Openwork heart made from the “roll” element
To create a paper heart with your own hands, prepare:
- quilling paper cut into strips (you can cut it yourself from colored double-sided paper, but this is a very time-consuming process)
- thick cardboard
- curly scissors
- stationery knife
- PVA glue
- special quilling tool
A quilling tool is a tool for curling strips of paper with a forked tip. You can buy it at the store, or you can make it yourself using a ballpoint pen case and a thick sewing needle. You need to cut off the tip of the needle a little, on which the eye is located, and then insert the needle with the tip inside the body of the pen.
So, let's start creating a valentine with your own hands. Draw a heart shape on cardboard and cut it along the contour with curly scissors.

Inside the resulting heart, draw another, smaller one, and cut it along the contour with a stationery knife.

Base width 6-7 mm
Then the cut paper strips must be twisted into spirals (in Quilling this element is called a “roll”).
To make the heart more interesting, take paper of different shades of pink and make spirals of different diameters.

Carefully place the rolled paper rolls inside the heart:

Now the most important stage: each roll needs to be glued to the one nearby, and the outermost ones also to the heart itself.

If you see large gaps between large rolls, fill them with tightly rolled rolls in a contrasting color. This will make the heart look even more voluminous.
Move the heart carefully while drying to prevent the paper from sticking to the work surface!
As a decoration, you can tie a small ribbon or braid to this openwork heart.

Write a declaration of love in a circle on a white outline :)