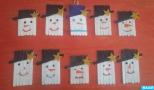
Crochet amigurumi toys year of the dog. How to crochet a dog - step-by-step description, diagrams and recommendations
Perhaps not a single purchased thing, no matter how much it costs, can be better than something made with your own hands. This is not surprising, because every master puts his soul into his craft, as if he brings it to life.
At the preliminary stage you should prepare:
buy a 2.5 cm hook;
choose what color thread the dog will be knitted from.
By the way, it is worth mentioning the thickness of the knitting threads. Choose ones that are usually used to knit lace. They will not become shaggy, and knitting such a thing with them is much more convenient.
So, let's get to the main point. Do you really want to, but don’t know how to crochet a dog? A master class with a detailed description of the technology will help you.

Technology
Now let's take a step-by-step look at how to make a crocheted dog.
Amigurumi is a special art of knitting small and sometimes tiny products. It originated in Japan and has found recognition among needlewomen around the world.
Amigurumi can be knitted either by knitting or crocheting. It all depends on personal preference. But the size of the knitting needles and hook should be deliberately chosen smaller than for regular knitting. And all because the product knitted using this technique should be quite dense, without gaps or holes.

The article uses generally accepted notations:
sc - single crochet;
VP - air loop;
x() - repeat the action as many times as indicated in brackets;
* — repeat the previous action.
Each detail (tail, paws, body, head, ears) will be considered separately. This is necessary so that even novice needlewomen can understand how a crocheted dog is made. The description of the knitting technology will be detailed and clear. And you will definitely succeed!
How are the legs knitted?
The knitting technology for all amigurumi toys is very similar. Having figured it out using the example of a dog, you can easily knit any other animal.
Start knitting the dog from the legs. They, unlike the head, are not very visible, and if at first something doesn’t work out, it won’t be noticeable.
So, crocheted dog legs do not have a pattern as such. But there is a small step-by-step instruction. By following the tips, you will learn how to crochet a dog.
Knitting technique for legs:
Cast on 6 loops and connect the last one to the first. Now, until the end of the entire piece, simply knit in the round.
In the second row, knit 2 sc from each bottom loop, pulling out two new loops in turn. When the row is completed you have 12 stitches.
In the third row, from each loop of the previous row, knit 1 sc and add 1 ch. Such manipulations are repeated until the end of the row. When finished you will have 18 stitches.
18 rows, 1 sc in each loop of the bottom row.
When finished, secure the thread and cut it.
The second leg is knitted according to the same principle. Just don’t cut the thread at the end, but tie 5 ch from it and connect it to the second leg.
How does the body fit?
Using the legs as an example, you can see that amigurumi technology is quite simple. And even novice needlewomen will be able to repeat it. With a little effort they will end up with an adorable crocheted dog.
Amigurumi toys are loved not only by handicraft mothers, but also by their children, for whom they are mainly crocheted. After all, cats, bears and dogs are original and unique, and no one else will have the same one. Besides, my mother made them, that’s the main reason why they are the best and most expensive.
Body knitting technique:
Continue knitting along the connected legs.
Also knit in the round, only now in a larger circle. 18 sbn on the first leg + 5 sbn on the dialed chain + 18 sbn on the second leg + 5 sbn. The circle is closed. There are 46 stitches in a row.
4 rows with 1 single crochet in each stitch of the bottom row.
9 single crochets, and then knit the next two loops as one. Repeat 4 times and at the end (knit 2 sc)*.
42 single crochets;
(8 sc, 9-10 together) x 4, *.
38 single crochets.
(4 single crochets 5-6 together) x 6, *.
(3 and 4-5 together) x 6, *.
(2 and 3-4 together) x 6, *.
(8 and 9-10 together) x 2.
Fasten the thread and cut it.

How are the paws knitted?
How to crochet a dog? This question worries all novice needlewomen. And the purpose of this master class is to tell,
For beginners, a detailed step-by-step description is presented that will allow you not only to knit a dog, but also to understand the technology of knitting amigurumi toys.

Paw knitting technique:
6 loops in a ring.
(1 single crochet + 1 ch) x 6 = 12 loops.
2 rows of 12 single crochets.
(4 and 5-6 together) x 2.
10 single crochets.
(3 and 4-5 together) x 2
8 single crochets.
(2 and 3-4 together)x2.
6 single crochets.
Also knit the second leg.
How are the ears knitted?
How cute they are - dogs, toys in this technology are presented in a whole range on the Internet. However, it is quite difficult to find the most understandable and detailed among them.

This article, which describes in great detail how to crochet a dog, is a master class that is accessible even to novice needlewomen.
Ear knitting technique:
6 loops in a ring.
(1+1ch) x 6 = 18 loops.
(2+1 ch) x 6 = 24 loops.
14 rows 24 single crochets.
Cut a long thread (to connect all parts of the product) and pull out a loop.
Also knit the second eye.
How to knit a head?
It's not that difficult to crochet a dog. The product design is quite simple and easy to implement. Having understood it, you can say that you will master the amigurumi technique. And then all that remains is to polish your skills. But the game is worth the candle!
After all, having easily figured out how to crochet a dog, you can knit any toy you like.
Head knitting technique:
6 loops in a ring.
(1 single crochet + 1 ch) x 6 = 12 loops.
(1+1 ch) x 6 = 18 loops.
(2+1 ch) x 6 = 24 loops.
(3 + 1 ch) x = 30 loops.
(4 + 1 ch) x 6 = 36 loops.
(5+1 ch) x 6 = 42 loops.
(6 + 1 ch) x 6 = 48 loops.
7 rows of 48 single crochets.
(6 and 7-8 together) x 6.
(5 and 6-7 together) x 6.
(4 and 5-6 together) x 6.
(3 and 4-5 together) x 6.
(2 and 3-4 together) x 6.
Cut a long thread (to connect all parts of the product) and pull out a loop.

How to knit a muzzle overlay?
To make the dog look as much like a real one as possible, you should separately knit a special overlay for the muzzle, which will have a nose and mouth.
Technique for knitting a muzzle:
6 loops in a ring.
(1 single crochet + 1 ch) x 6 = 12 loops.
(1+1 ch) x 6 = 18 loops.
(2+1 ch) x 6 = 24 loops.
3 rows of 24 single crochets.
Cut a long thread (to connect all parts of the product) and pull out a loop.
How to tie a ponytail?
Every dog has a tail. And knitted one is also necessary.
Ponytail knitting technique:
6 loops in a ring.
(2 single crochets + 1 ch) x 3 = 9 loops.
7 rows 9 single crochets.
Cut a long thread (to connect all parts of the product) and pull out a loop.
Assembling the dog
That's practically all. The parts of the toy are ready, now they need to be connected. To do this, use a hook or, if you prefer, a needle.
It’s better to start with the muzzle, as this is the most difficult moment in creating your dog. Sew the ears onto the top of the head. Then fill the head with filler (for example, cotton wool), and carefully connect it to the muzzle cover. Embroider the mouth and nose. And then sew on the button eyes.

The next step will be the body. Sew a tail to it, which must first be filled with cotton wool or any other filler. Then stuff the body and connect it with the paws of the dogs, which should also be stuffed first.
Crocheted and ready! You can give it to your child for joy.
As you can see, it is not so difficult to crochet a dog. The knitting pattern of the parts and their subsequent assembly are very simple. And to perform the toy itself you will need:
your imagination, desire and a little diligence.
All this is quite accessible. In addition, the result will please both you and your children. And also an unusual (or any other animal), the master class of which you have just studied and brought to life, will be an excellent gift for your loved ones or friends! Both small and older people.

The technology for knitting amigurumi toys (namely, the dog described above belongs to this type of needlework) is always the same. If you are now holding a knitted dog in your hands, then you have mastered the amigurumi technique. And now it won’t be the slightest difficulty for you to knit, for example, a bear, a cat, a bunny or any other animal!
Success in creative work!
Cute crocheted dogs of all possible shapes, sizes and colors can be an excellent gift. They will delight adults as a thematic gift, becoming an original part of the interior, and for children, knitted dogs will be a bright, beautiful and safe toy.
The options for crocheted dogs are many and varied, ranging in size from miniature amigurumi to full-size toys, from specific breed puppies to fantasy designs. You can create lying and sitting dogs, or anthropomorphic doggies dressed in exclusive outfits. Whatever toy is ultimately conceived, the general rules for creation, the set of necessary materials and tools will always be approximately the same.
What you need to knit a dog
Before you start crocheting a dog, you should prepare everything you need that may be useful in your work:
- yarn;
- hook;
- filler;
- needle;
- scissors;
- elements for decorating the product.
You can use any yarn for knitting dogs, but cotton threads are best, especially if the toy is intended for a child. The hook should be selected according to the thickness of the thread, it would be a good idea to take a hook one size smaller, then the knitting will be quite tight, this will help the toy maintain its shape and will not allow the filler to crawl out through the loops.
Sintepon or holofiber are suitable fillers, which, unlike cotton wool, will not form clumps and will make the product soft and pleasant to the touch. The dog's eyes can be made from buttons, knitted, embroidered, or purchased. If a creative idea involves making a costume or its elements, then you need to take into account that it should be knitted from thinner threads than the toy itself. Pieces of felt, leather or any other materials can be used to decorate the product, depending on the concept.
Crochet dogs, descriptions from our website
The new year is just around the corner; according to the eastern calendar, we will spend the next year in the company of a dog - a kind and devoted animal, a long-time friend of man. To appease an already good-natured creature, you can tie a symbol of the future

Good afternoon The Year of the Rooster has barely crowed, and needlewomen, judging by the publications, are already thinking hard about the symbol of next year. I’ll also add my two cents to the collection of all kinds of dogs. Dog Rex from the Polish cartoon of the same name

I will present dogs in three sizes. All the toys were tested, I knitted them to order, the customers were very satisfied. Large and medium dogs are crocheted No. 1.6, Alize Shekerim yarn, 100% acrylic. I made bows from felt and

Doggy Daisy. New children's yarn (yellow, brown and white colors). Hook No. 2. Height 22 cm. Eyes, nose and pattern are embroidered. Linked according to the description of Venelopa'toys. For a description of the dog, see the link.

To knit amigurumi you will need: Yarn “Children's New” from Pekhorka Hook No. 2.0. Yarn in white, blue and blue colors. Black eyes for toys or beads. Needle for sewing soft toys. Filler. Crochet dog, description Knitting a dog's head. 1st row: 6 tbsp. b/n in amigurumi ring

Chishechka - crochet smile. To crochet a dog you will need: - hook 2.0 - Areola yarn, acrylic (white and black) - finished nose on a fastening (can be embroidered with black thread) - dry pastel for tinting - bow Legend: ss - connecting post sc - post without yarn over pssn -
Crochet a toy dog, ideas from the Internet
Translation: Ekaterina Ruban.
This simple pattern is also suitable for beginner knitters.
Necessary materials:
- Threads are basic colors, a little white, black, pink, gray and yellow.
- Thread-matching hook
- Filler
- White and black felt
- Pins
Materials:
- Yarn Kamtex “Lotus Grass Stretch”, about ½ skein of white and a little black;
- Hook No. 3;
- Eyes and nose;
- Holofiber;
- Wire for ears and tail;
- Black oil pastel and a hard brush;
- Black thread for embroidery.
- When using these materials, the height of the toy is 11.5 cm.
For work we will need:
- yarn (preferably fluffy)
- hook suitable for your yarn
- filler
- scissors
- needle
- eyes
- spout
- harsh threads (for tightening)
Crochet amigurumi dog
I suggest crocheting a small dog that will become a cute souvenir. I'll be very happy to see what you come up with, so
be sure to send photos.
Materials:
The toy is the size of your palm, so for comfortable knitting, use yarn of medium thickness. The example in the photo is crocheted from Gazzal Baby Cotton (60% cotton, 40% acrylic, 165m in 50g) with 2.2 mm crochet.
You will also need filler and half-bead eyes (I have 8 mm).
The height of dogs made from these materials is 9-10 cm.
Materials and tools:
- acrylic 100g/300m or any other yarn of your choice:
- main color (beige), white (for the muzzle), brown (for the ears),
- hook No. 1.8-2, or suitable for your yarn
- filler
How to crochet a dog from Vendulka

Crochet a cute puppy
How to Crochet a Bulldog Dog

The beautiful word amigurumi refers to a special technique for crocheting small animals and dolls. This is a fairly simple technique of knitting in a spiral with single crochets and without joining the rows. The figures are knitted in separate parts, then assembled together, filled with padding polyester, wire or any other filler.
In this article we will look at how to crochet an amigurumi dog with a diagram and description. Such a dog will be a good toy for children and a stylish and kind New Year present for adults. We will look at two dog options: a dachshund and a cute puppy.
Dachshunds knitted or sewn always look stylish and interesting. Children love to play with them, but as an interior toy, it seems you can’t find a better dog. In order to crochet an amigurumi dachshund dog, the diagram and description of which are given below, you must first select the threads.
Or any small toy can be knitted from regular cotton, acrylic or wool yarn. Leftover threads are good for this purpose. You can make a monochromatic animal or combine colors at your discretion. If you are planning to buy threads specifically for a toy, then turn your attention to “Children’s New” acrylic. This is a very pleasant thread to work with, it does not roll up during use and does not fade when washed.
For more experienced knitters, plush yarn can also be used. The animals from it will turn out to be very cute, soft and gentle to the touch, but it is quite difficult to work with.
You can use the “Kuzya” or “Grass” thread; here you will have to be more careful, since due to the characteristics of the thread it is very difficult to knit stitches and loops.
The color of a toy dog can be absolutely any color. For an amigurumi dog crocheted for 2018 (the diagram and description are given below), threads in yellow, sand, and mustard shades are suitable, as this will be symbolic, because the coming year will pass under the sign of a yellow dog. Let's prepare to work on the dog:
- Threads of the described composition and any color to choose from.
- The hook is smaller than recommended on the yarn.
- Beads or blanks for eyes.
- A needle with a wide eye for collecting parts.
- Sintepon.
And now the most interesting thing - a description of the crocheting process with patterns for an amigurimi dog - a dachshund. In order to create such a cute dachshund, you need to knit all the parts of the dog separately. We start with the head, then the body, paws, ears and tail. Knit all the details according to the description in the photo. When everything is ready, you need to assemble all the parts, sewing with the same thread and a needle with a thick eye.

You can use a thread fastening or a button-thread fastening of the legs, then they can rotate. We do this: we sew 2 legs at once right through the body, sewing buttons on both sides at the same time. We always pierce in the same places. We use a button with 2 holes.
A dachshund dog can be knitted in a single color using one color of thread. Afterwards, you can knit circles with contrasting threads, for example white, and sew them along the dog’s body, imitating spots. Dyed thread of melange or sectional coloring will also be good for a dachshund, then the dog will turn out to be motley. You can use thread marked "Tweed". This yarn has characteristic speckles, which will make the dog homely, cozy and stylish.
For decoration, you can use any braid or even a chain that you tie around your neck.
Lessons on knitting details using the amigurumi technique
When knitting a dog using the amigurumi technique, the main thing is to understand the principle. Here it is important to knit each detail carefully, in closed rows in a spiral. They usually start with the head or body, and small parts are knitted afterwards, these are arms, legs, tails and ears.

To start knitting, make a regular air loop, knit 6 single crochets into it (it is these types of stitches that toys are knitted). Then add the same number (6) sc in each subsequent row.
First in each column of the previous row, then after 1, then after 2 and so on. Deductions are made according to the same principle.
Look at the diagram on how to finish knitting parts so that there is no hole left.
Another important detail: all the toys are knitted in a spiral, without closing the row and without lifting for the next row. There seems to be 1 spiral row here. And decreases are made by the so-called “invisible decrease”, when an unfinished single crochet is knitted, and then all the loops on the hook are knitted with one loop.
Cute amigurumi puppy with description

- Dolce threads. This is a plush synthetic yarn from YarnArt.
- Hook number 4 or 4.5.
- Eyes and nose with fastening.
- Sintepon.
We start working with the dog’s legs, since after that they go into the body and are not sewn on:
- Make a loop and knit 6 sc into it.
- Next, add another 6 sc, as described above.
- We don’t add any more increases for the legs; we knit this way for up to 9 more rows.
- We also knit the second leg, then move on to the body, knitting all the loops of 1 leg, and then all the loops of the other leg in one circle. We stuff our feet with padding polyester.
- Now we knit the resulting 24 sc. 1 row.
- In the next row we make 6 increases, we get 30 sc.
- We knit 5 rows without changes.
- We make nooses 1 time 6 sc. Afterwards we knit a row without changes, 24 sc.
- We make another decrease 1 time 6 sc. Afterwards we knit a row without changes, 18 sc.
- So we finish the body, stuff it with synthetic padding, and cut the thread.

The dog's head is not knitted with a regular ball, but with the nose knitted. We do this:
- As usual, we make 6 sc in the loop and add 6 sc in each row. In the seventh row we get 42 sc.
- We knit up to the 11th row without changing the number of sc.
- Now the most difficult part is shaping the nose. We increase only in front, we get 50 loops. We knit the row without changing, then we decrease the cast-on loops in the previous row.
- We knit a row without changing the number of sc.
- We make decreases in the same order as we dialed the sc.
- We stuff the head when there are 12 loops left, then decrease 6 sc and finish knitting.
Now we knit 2 handles. For them you need to dial 6 sc in the loop, in the next row add only 3 sc (you get 9 sc) and knit 5 rows like this, then subtract 3 sc and knit 3 more rows. Fill the handles with padding polyester and sew up the edge.

We knit the dog’s ears like this: we put 6 sc into the loop and make increases as usual in three rows of 6 sc, we get 24 sc. We knit them without changes for 10 rows, then decrease 6 sc every other row. When 18 sc remain, sew them in a row.
After all the parts are ready, we assemble them by sewing them with a needle. Sew on the eyes and nose.

Afterwards, you can knit a double crochet collar of the length required to encircle the dog’s neck, sew it on with a needle, attach a bead or bell to it, or you can simply tie a ribbon with a bow.
You can use any plush yarn to knit cute puppies. This is a special soft thread that makes the toy tender, soft, and pleasant to the touch. But this thread is quite difficult to knit with. It is more suitable for more experienced craftswomen. You can also use grass yarn. Then the puppy will turn out shaggy and fluffy.
By combining threads, you can create the effect of long hair or short hair in different places, changing the color, you can make the dog spotted or striped.

The size of the dogs can be varied with a large number of increments and knitting can be based on the given principles and patterns. If you take a thicker thread or fold the thread in half, this will also increase the size of the toy.
If you tie thinner and longer paws, you can insert a wire into them, and they will bend, so the dog can be seated and given different poses. But you need to be careful and careful, round and secure the ends of the wire in the toy well, otherwise they can injure the child when playing.
The nose and muzzle can be knitted for the dog, as described above, or you can simply knit a round head and sew on a felt muzzle, or a bleached knitted white semicircle.

When knitting toys, it is better to start with large parts, then knit small ones. This way you can adjust the size of the paws and tail, based on the size of the toy’s head and body.
You need to knit as tightly as possible, it is better to take an even smaller hook number so that the stuffing is not visible and the synthetic fibers do not come out.
Hi all! Today I want to offer you an unusual topic, or rather, even this relates to one of my favorite hobbies. Once upon a time, I was fond of knitting and crocheting. With the birth of my babies, I rarely started knitting, but the moment came when the children grew up a little and I had time to make souvenirs with my own hands.
Today I suggest you knit funny puppies, one might say animal dogs, which will be made using the amigurumi technique. Moreover, the New Year is just around the corner, and the symbol of next year will be a dog. I hope you like my selection.
I will say right away that I took all the pictures and photos that you will see here exclusively from the Internet, I selected exactly those that I liked the most, and those that are in the public domain for everyone.
I’ll start with the simplest and most uncomplicated descriptions of the work to help beginners understand how to knit such wonderful creations, because they are only at the very beginning of the path of handicraft activity.
Of course, I understand that many people like certain breeds of dogs and therefore you would probably want to breed the one that you love most. Perhaps you have such a pet living with you, but unfortunately, I cannot provide you with so many diagrams and step-by-step descriptions of all dog breeds.
1. I propose to knit you, first of all, the easiest dog in the amigurumi style, in my opinion.
This is such a mischievous blue puppy that any child will be happy to see.

Knitting stages:
1. First of all, prepare all the tools and materials for work. Tie the legs and body first.

2. Then start decorating and knitting the head.

3. All other parts of the body are knitted separately. Read the instructions and follow all instructions.

2. For the little ones, I want to suggest knitting such a wonderful masterpiece, it’s just lovely, see for yourself:


3. The next option is actually funny, such little cuties and charmers can live in your house. They are cute and very small in size. It won’t take much yarn at all, you can knit a whole bunch of these:

4. You can also crochet a keychain in the shape of a dog.


Don't forget to glue on the nose and eyes, ears and paws. Also, using a needle and thread, embroider the place where the nose is, a vertical strip, you can make eyebrows. To make a tail, you can simply tie a regular lace from loops, and then sew it on where the dog’s butt is))).
5. You can see a fairly simple version of a dog for beginners in this step-by-step photo instructions:

Crocheted amigurumi dogs for the New Year with descriptions and work patterns
I couldn’t ignore this topic, because the holidays are coming, and this is what I found:

All these four options just fell into my soul, I share one of them on the pages of my website in more detail with all the descriptions of the work, from these pictures you can knit such a wonderful dog. If you have any questions, write your comments and reviews.
Start the craft with the paws, tie two identical paws, and then connect them together.

This way they will not be sewn on separately.

After you knit the body, knit two legs and ears, and then a muzzle and a red cap, like Father Frost or Santa Claus.


But the other three master classes, if anyone needs them, write to me, I will send them to your email absolutely free of charge, just leave a comment at the bottom of this article))). I will definitely answer.
And you know what’s the coolest thing: from a brown dog, or rather a template and diagrams, you can make not only a puppy, but other animals, such as a deer, a koala, a bear and a lamb, see for yourself:

The body and head are the same, such a universal layout, just a different design. Great and just a super idea!
Master class crocheted amigurumi dog toys. Videos
Since crocheting puppies is already popular this year, the time has come when 2018 is just around the corner, so I offer you these detailed stories with such bright multi-colored dogs:
I also suggest you knit an unusual dog or, you could say, a craft in the form of a ball for a Christmas tree:
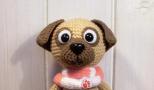
And here is another video that shows step by step and in detail how to tie up a little pug:
Do-it-yourself white and yellow dog - a symbol of 2018
In fact, the symbol of the coming year will be a dog in light yellow colors; this information is taken from the eastern calendar. Although some sources speak specifically about a white dog. I think that in any case, every needlewoman can make such a toy souvenir or talisman.
Since there were different opinions, I found two master classes in two different colors. One is quite easy, the other is a little more difficult, choose the one you like best.
1. A white and gentle-looking puppy named Bobik will decorate any New Year tree or act as a decoration on the holiday table.


2. Well, in the golden color of yellow shades, such a cool and super wonderful dog named Romashka can live in your home:

That's all for me, and in conclusion, I want to offer you a bunch of pictures and photos with knitted dogs from young craftswomen. Do you want the same ones for yourself??? Bow-wow)))
Perhaps you didn’t like the options that I showed you before, so choose from these, but I can send you step-by-step instructions and descriptions with diagrams for free to your email, just write a comment below with a request to send master classes of animals in the form of dogs.
I have such a mischievous family, just super in my opinion!

The selection is large, but how diverse it is.

There are dogs of different breeds, almost all of them, or most of them))).

These include pugs, poodles, mongrels, chihuahuas, bulldogs, Dalmatians, dachshunds, huskies, dogs in the shape of a tilde doll, and even the hero Buddy from the cartoon about the Barboskins, Snoopy. And just for the little ones, there is a pattern for knitting a rattle.

I don't know about you, but I like it.

Look at these charming cuties, there are Bobiki and Balls, and even Barbosik with a smile.

Do-it-yourself crocheted toys have always been valued and will be the most original gifts, and most importantly, safe for children and adults.

I think that all dog fans will certainly be happy with this selection. In addition, I got it for free, of course I had to go to different sites and collect it, so I am happy to share it with you, dear guests and readers of the blog. I hope it will be useful to someone))).
By the way, you can send me your photographs of animals through feedback, just write a letter and I will be happy to publish your work here on this site.

That's all for me, I have such a plush and soft selection of toys! See you all! Bye bye!
Sincerely, Ekaterina Mantsurova
Knitted crafts can be not only cute and beautiful toys for children, but also excellent souvenirs or gifts that will decorate and, perhaps, complement the interior of your home. If you're just starting out with crafting, try crocheting small amigurumi-style dogs and you'll soon be wanting to fill your space with lots of these adorable, easy-to-make stuffed animals.


Amigurumi - knitting for everyone
This beautiful and interesting word is the name of one of the techniques in the Japanese art of knitting small animals - needlewomen knit bunnies, cats, dogs, bears, monkeys, owls, sheep and many other little animals. Initially, such knitting was done both on knitting needles and in crochet, but recently crafts made with crochet have become increasingly popular.
As a rule, to knit amigurumi, you take regular colored yarn and use a very simple knitting method - in a spiral. An amigurumi dog, like any other knitted toy in this style, begins with knitting the so-called amigurumi ring. If you look at the diagrams, you will see that it is usually indicated there in the first row.


However, if you wish, you can start in a different way: just pick up two air loops and knit the number of single crochets that you need into the second loop from the hook. However, keep in mind that the amigurumi ring has a very big advantage, since with this method of knitting you will not have a hole in the middle.


In Japanese technology, unlike European technology, there is, as a rule, no need to connect circles. It is better to knit with a crochet that is a couple of sizes smaller relative to the thickness of the selected yarn. This way you will be able to create a dense fabric in which there will be no openings or gaps, and this will help preserve the stuffing material and give the toy a more aesthetic appearance.


The amigurumi dog is made in parts, which are then connected. Sometimes, to give life weight to the limbs, plastic pieces are used to stuff them, and the body itself is stuffed with fiber filler.

Master class Dachshund rainbow amigurumi crochet

Before you start working directly, prepare everything you need:
- yarn of the desired colors (as a rule, you will need several);
- hook relative to the thickness of the yarn;
- filler (you can use cotton wool or padding polyester);
- scissors, glue;
- a special needle for sewing soft toys or a needle with a large eye;
- blanks for the nose and eye (these can be beads), other decorations, if you like.
Decide on the expected appearance of your future toy. An amigurumi puppy can be any breed: dachshund, bulldog, poodle, dalmatian, papillon, shiba, shiba inu or any other. Depending on what you choose, you will need to select the colors of the yarn.
And here are some examples for inspiration. Let's start with the dachshund.


- The dachshund amigurumi will look very beautiful if you use threads of bright rainbow colors to create it. You will also need a thin hook (No. 1.5).
- First make the body of the dachshund. You need to start and end with one color (let it be brown), and in the middle place stripes of all the colors of the rainbow. Having tied the body, fill it with filler.
- Then grab your head. You need to start knitting it from the spout, that is, with black yarn. Then also stuff and tie.
- Now it’s the turn of the neck and ears. And after that - the tail and paws.
- When everything is ready, sew all the parts together, glue on the eyes (or sew on beads). You can also make a small beautiful collar for your dachshund. To do this, you need to knit twenty chain stitches, connect them into a ring and knit twenty single crochets. Then cut the thread, choose some other color and use a thread of this color in the first row of the chain that you already have, knit another twenty sc on the reverse side. To finish the collar, take a bead, thread it through the thread and secure.
- Your rainbow and cheerful dachshund is ready!


 Having chosen the desired scheme, focus on it. First, tie the head and mark with dots the places where you will later glue or sew the eyes. Having finished the head with the nose, move on to the ears and front legs, then the body, hind legs and tail. Having knitted all the parts, stuff them with filler and sew them together.
 Finally, you can decorate your dogs with some interesting details or accessories, giving them a special personality, charm and character.